SingleParentChef.com

Cooking for family makes more than food.

This site is geared toward providing easy recipes, tips and tricks for parents who are on their own.

Stove-Press Sandwich for B'fast

About 30 years ago my dad brought home a sandwich stove-press. It’s the kind of thing that you might use on a camping trip or at home for a novel grilled cheese pocket-type thang.

This morning I woke up and wasn’t sure what I wanted for breakfast, I had the day off and my default move was to have eggs, but I wasn’t feeling it today. So I gave my fridge the once-over and came up with these ingredients:

  • American Cheese

  • Half an onion

  • Salami

  • Leftover tube of pesto from a Hello Fresh meal

  • a Campari tomato

Yes!!! A stove-press sandwich! It’ll have stuff that I’d put into an omelette but without the eggs. Calorie-wise I had some whole wheat bread that was only 80 cal a slice so I was ready to go.

In a nutshell, here’s a video of what I did:

A Stove-Press Sandwich in 24 seconds!

Here’s a breakdown of the calories:

2 slices whole wheat bread: 160

.5 ounce salami (fine dice): 47

1 slice American Cheese: 104

1/2 Campari Tomato: 3

3 Tbsp chopped yellow onion: 4

1 Tbsp salted butter: 102 (oops!)

1 Tbsp Pesto: 84

Total: 504

IMO, not horrible for a meal that will probably last me through lunch to dinner (I got up at 9:30) AND I’m doing a lot of manual labor today working around the house.

Also, with a quick look around Amazon, I found this bad boy which would accommodate larger slices of bread (now my mind is wandering over to Reubens…not the painter, silly, the sandwich!). NOTE: I cannot attest to the quality of this device, but it looks real nice, shucks!

My friends, give this type a thing a shot, I love it and my kids loved them too (when I didn’t burn them) and it cool making your own hot pocket sandwich.

Simplify and cut calories all at the same time.

Hey kids!

This is a recipe that I actually dreamt. It felt so good in the dream that I made a point of creating it this morning for breakfast.

It basically is made up of the parts of a bacon and eggs breakfast, including the toast, it's just that they're slightly rearranged/revamped to cut down on calories and be a bit less messy.

Here it is:

I start with three pieces of sopressata, sliced thin

IMG_20180902_132051_219.jpg

This was purchased from my local 'mom and pop' supermarket that features authentic Italian cured meats. I find Boar's Head sopressata works very well also.

I then nuked the discs for approx 1:45-2:00 min on high in a 1100 watt microwave until crispy.

Now is when I go off course a bit, and 'follow my dream', I blitz the sopre-discs in my mini-food processor until a fine powder.

Whirrrrrrr!

Then put mix the blitzed sopre-discs with some mayo and Dijon mustard


Sopre-discs/Mayo & Mustard

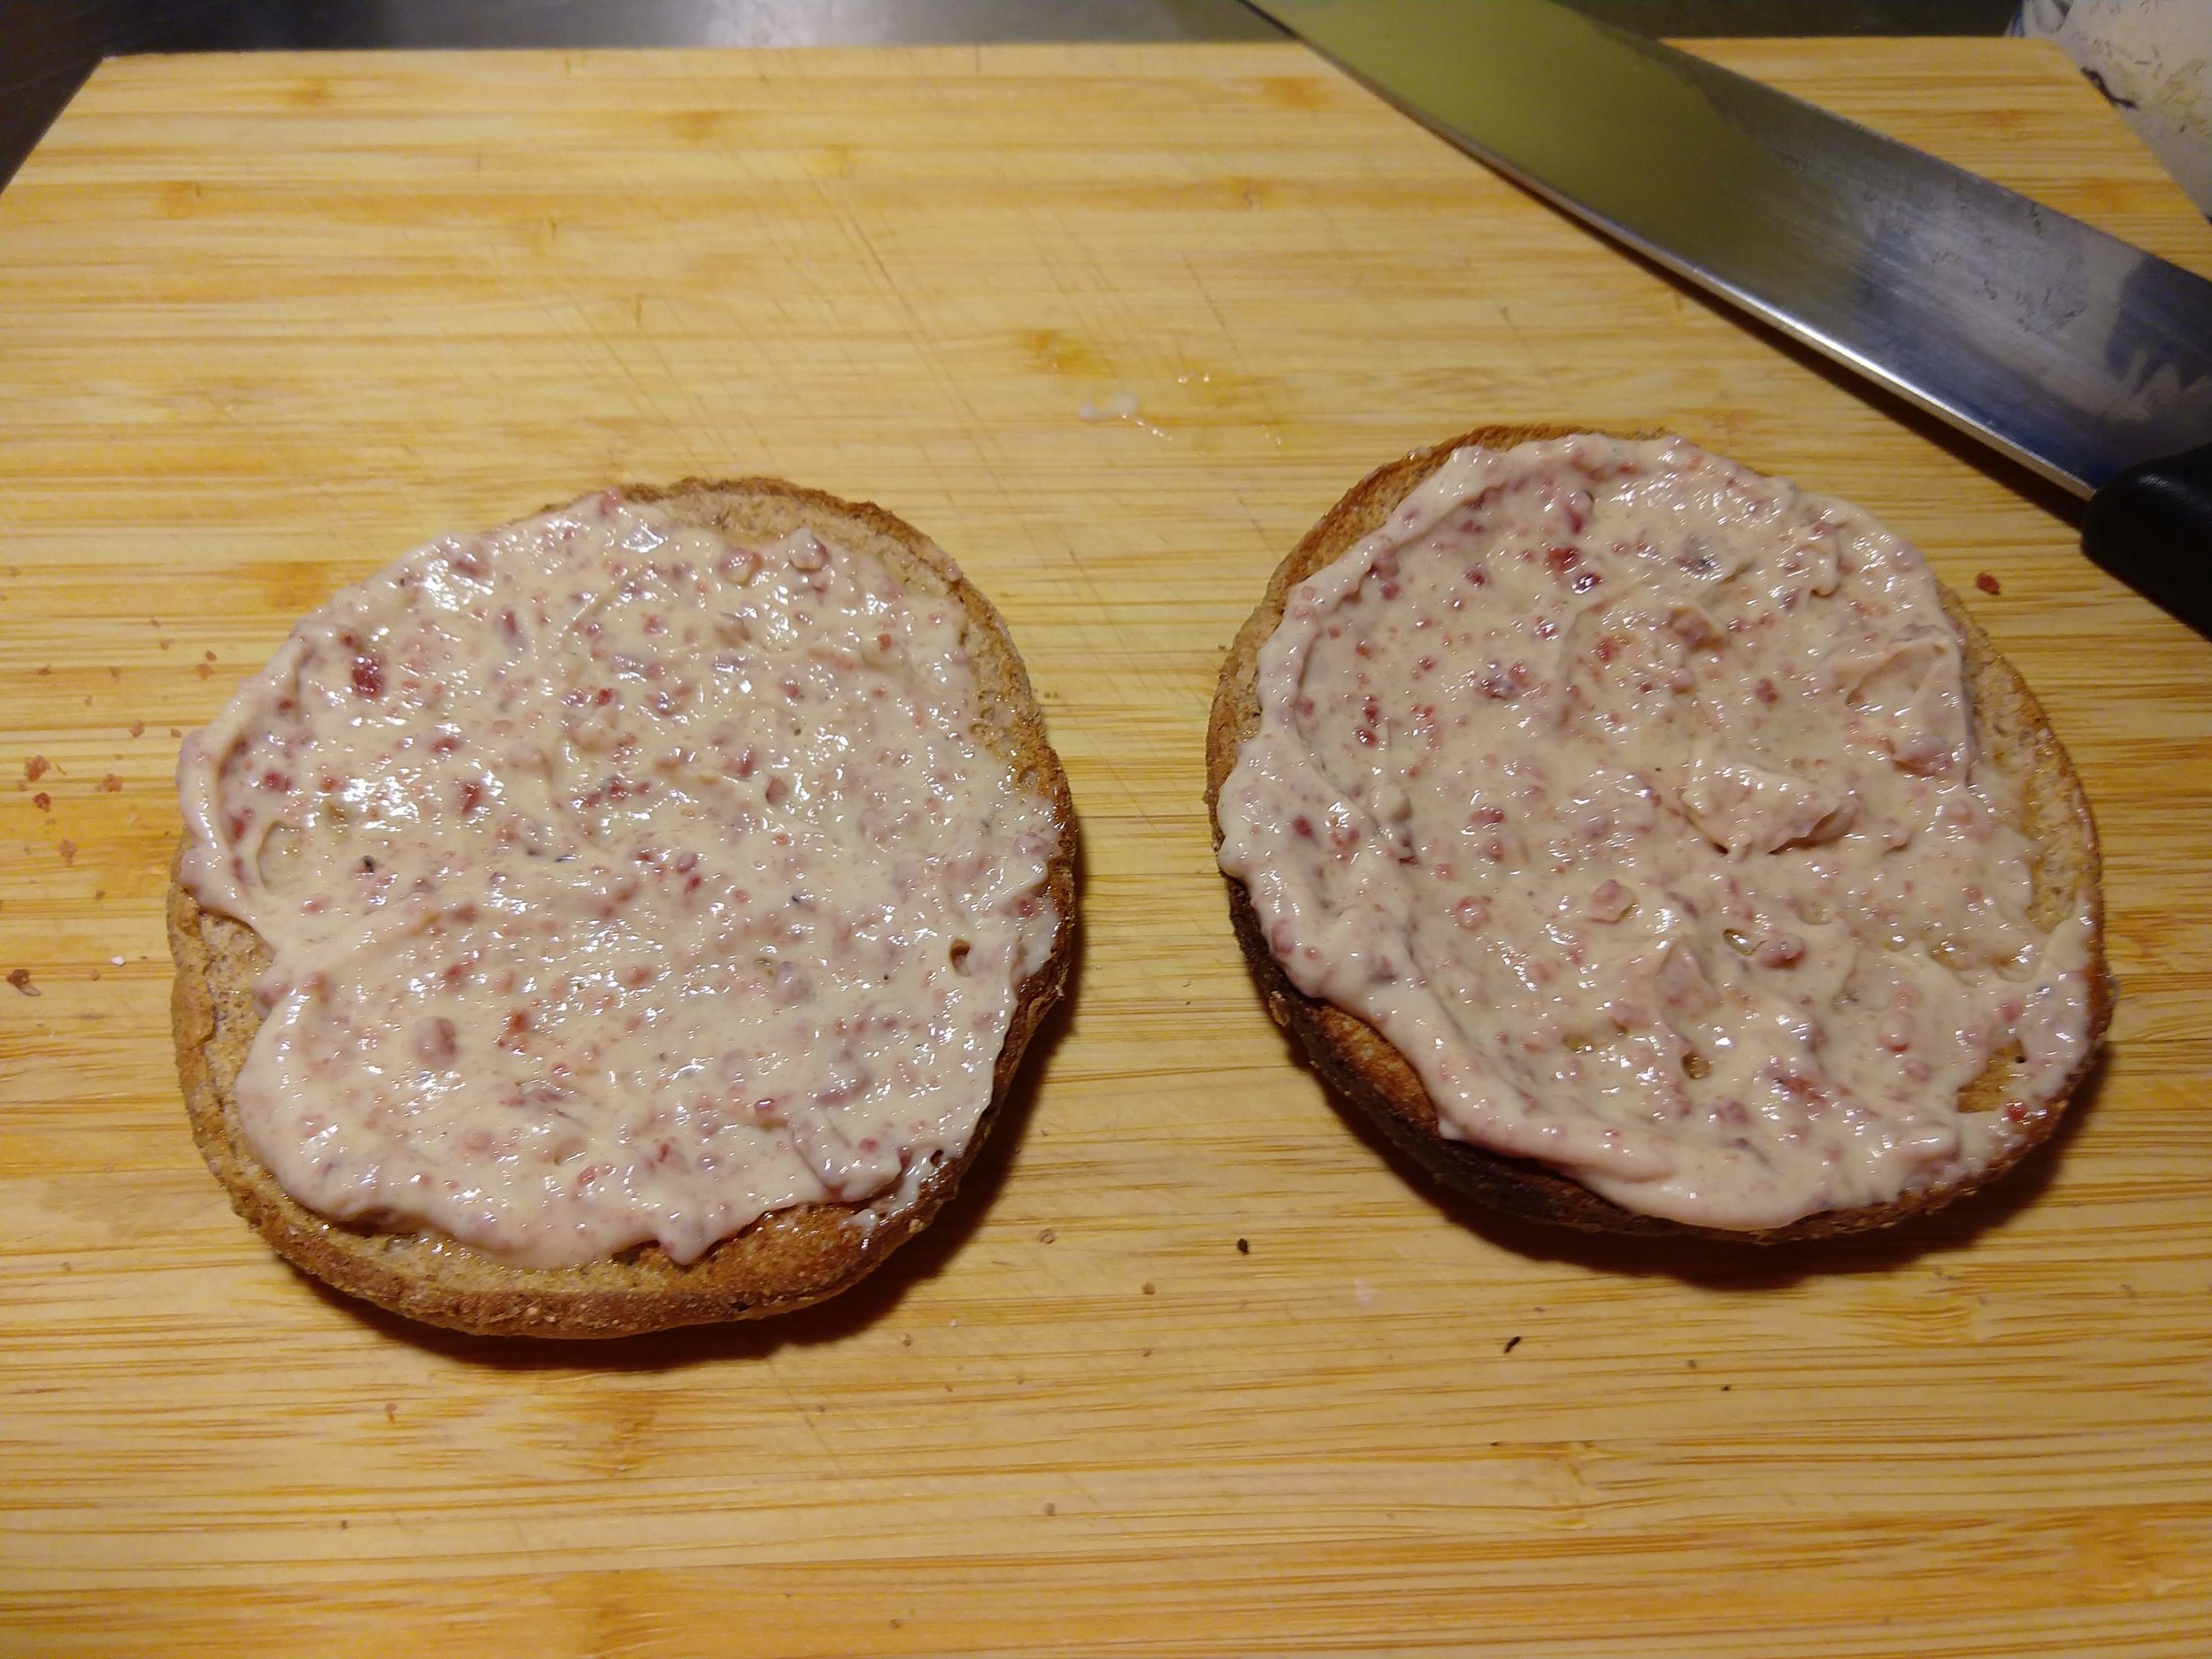
Now it's time to toast the whole grain thin bread and imbue with the sopre-mixture.

Lightly toasted and crunchy - just waiting for eggy goodness!!!

Lightly toasted and crunchy - just waiting for eggy goodness!!!

Scramble an egg, and prep just like you're making an omelette.

Using my trusty (not rusty) 10" cast iron pan, FTW!

Using my trusty (not rusty) 10" cast iron pan, FTW!

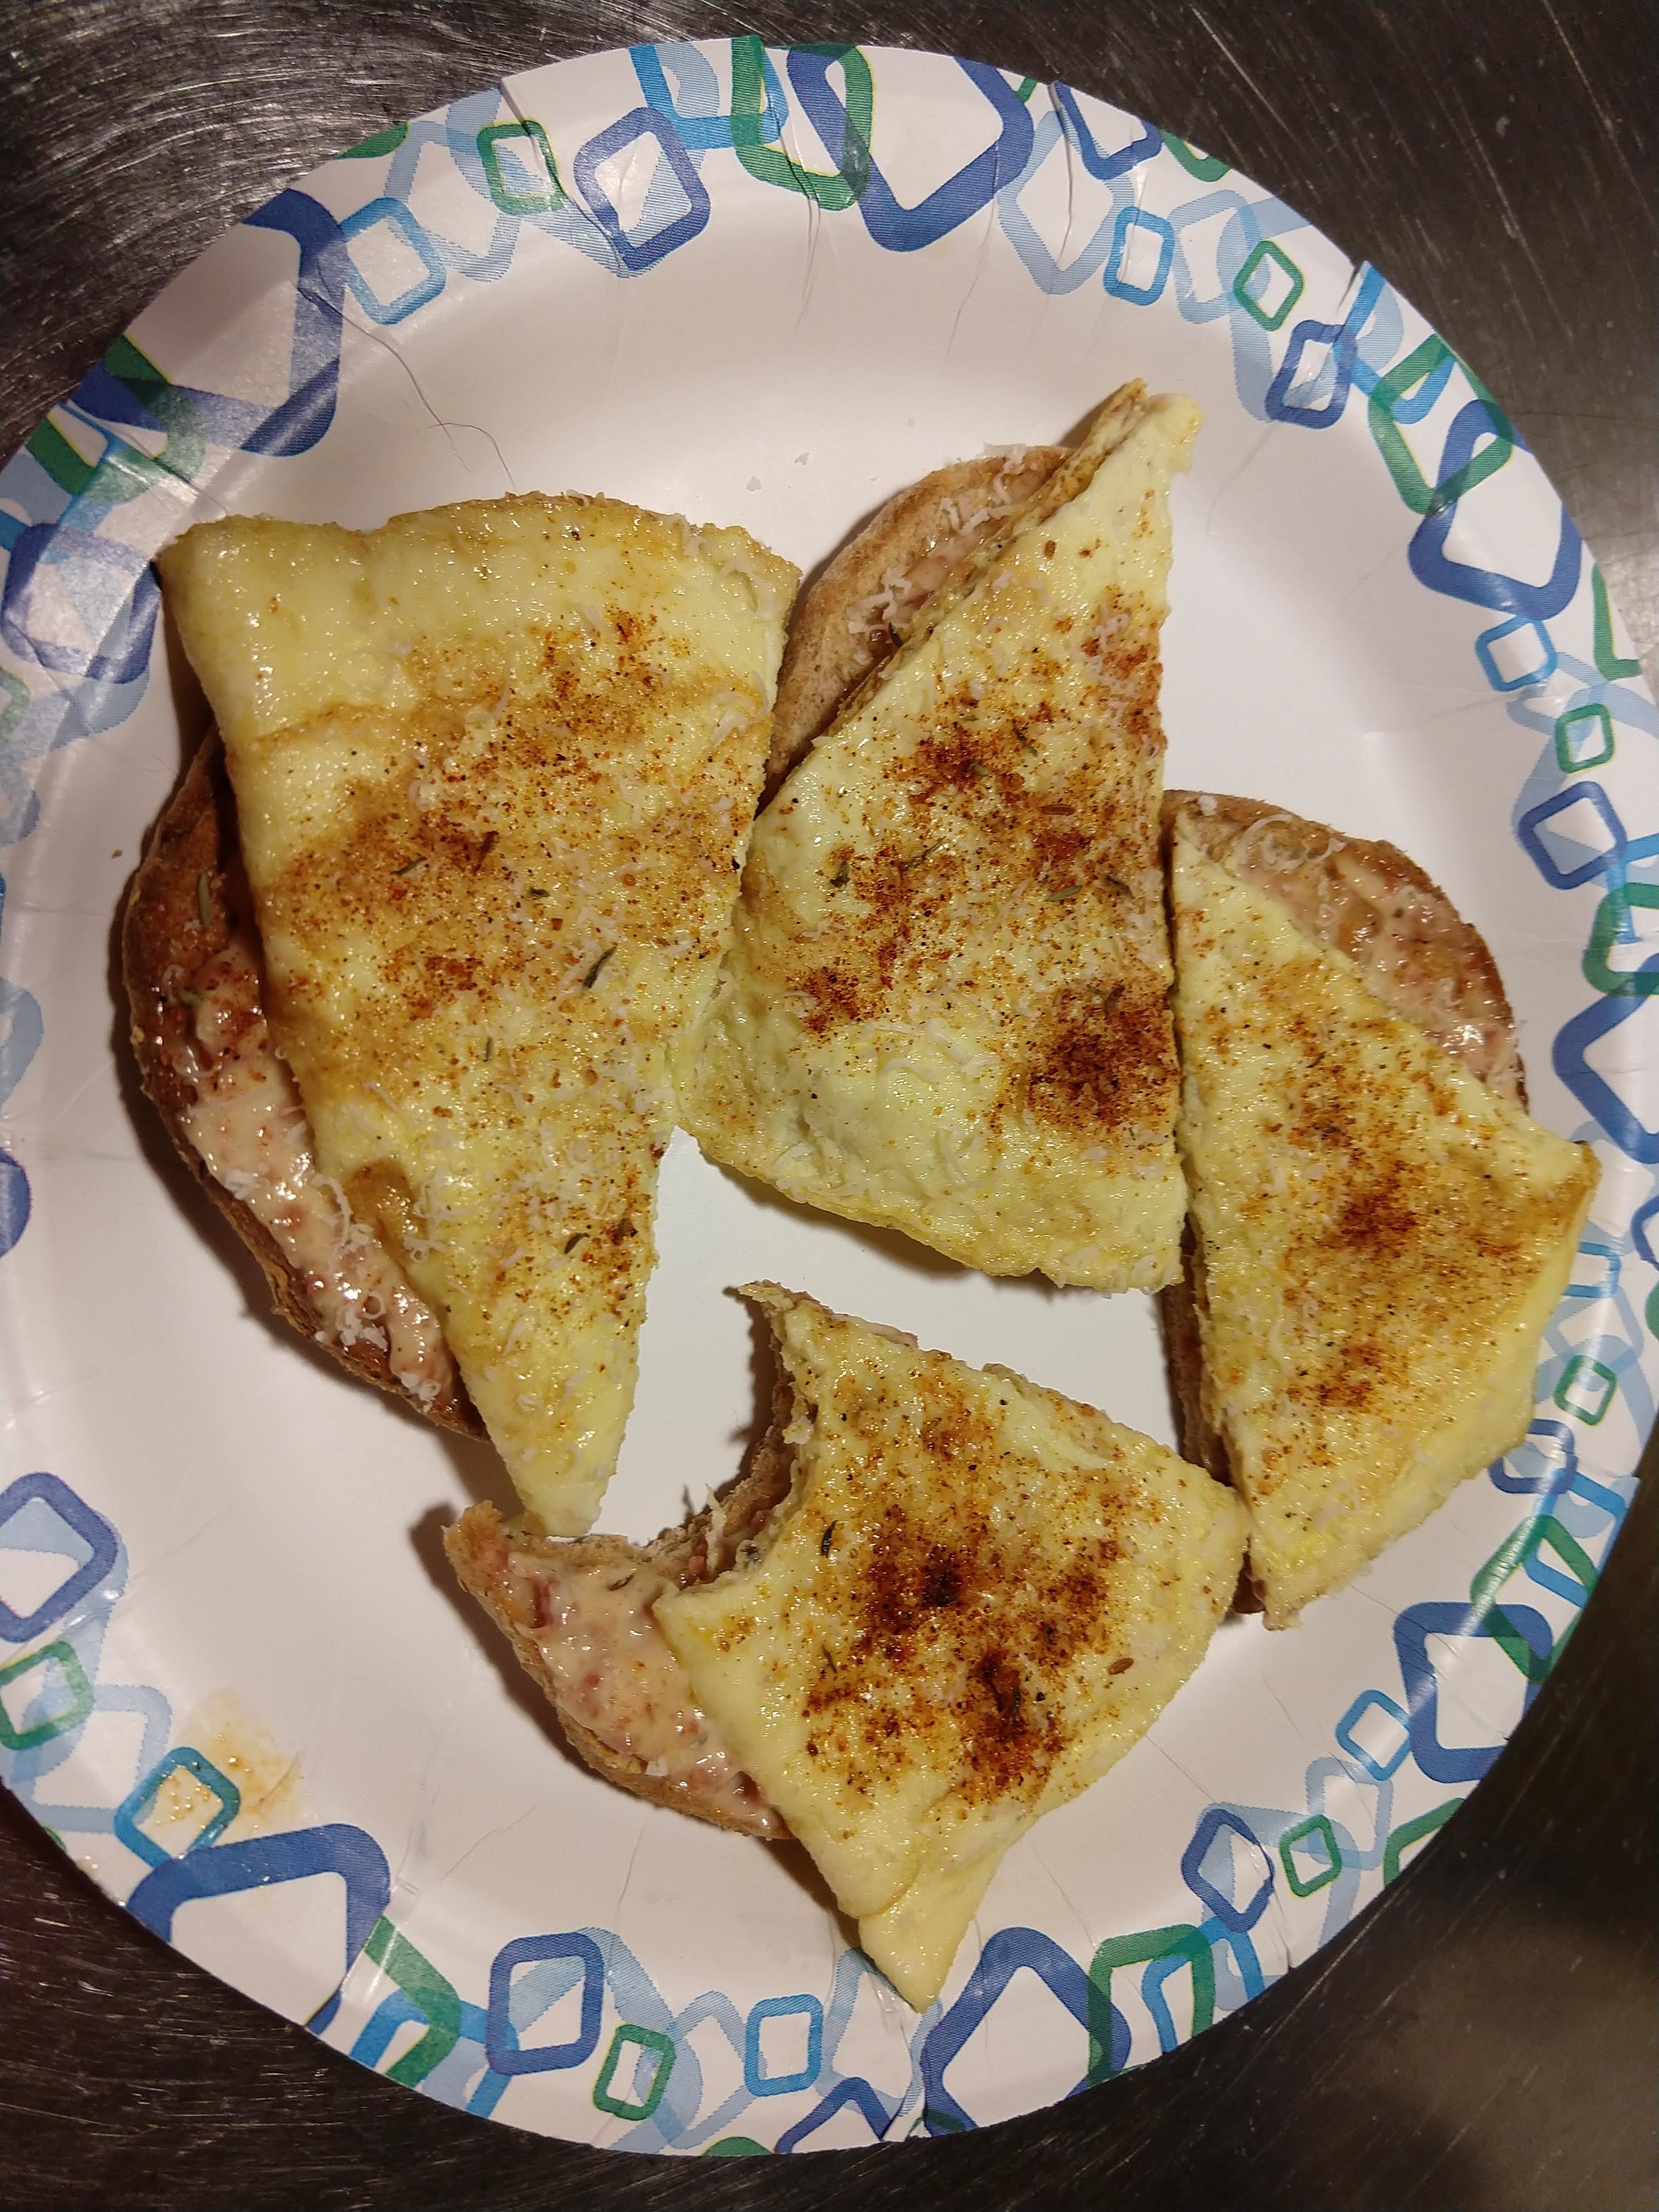
When the faux omelette is done, fold in half and then cut in half and place on top of toasty thangs.

Go this way!!!

Go this way!!!

Shred a little Parmesan on top and cut in half.

IMG_20180902_112807214.jpg

Time to eat!!! Yummy!

Doesn't last long enough but is quite filling, never the less.

Doesn't last long enough but is quite filling, never the less.

Here's the caloric breakdown:

2/3 ounce sopressata: 52 cal

1 scrambled egg: 91 cal

2/3 tbsp mayo: 62 cal

1 tsp Dijon mustard: 3 cal

1 Sandwich thin (Arnolds): 130 cal

2 tsp grated Parmesan: 14

Total Calories: 352

Regular Bacon and Eggs (2 slices bacon, 2 eggs over easy and two pieces of toast, 1 tbsp butter - whole wheat): 551 calories

There ya go!


Oatmeal Scones For Breakfast

In one of my video recipes I made oatmeal. I found oatmeal to be one of the best things to have for breakfast in terms of giving me energy and sating my appetite until lunch. The only problem was that it took time to make and isn't as portable as I'd like.

So I thought that a more portable vehicle for oatmeal would be a good thing to make and what I came up with was the Oatmeal Chocolate Chip Scone! Although it's not as big as a bowl of oatmeal, it still hits the mark in terms of being healthy and filling me up AND perhaps most importantly - my kids love them.

So here's the recipe, it's based on an Epicurious recipe that I modified slightly to suit my sweet tooth.

Hardware:

  1. Large food processor OR 2 large mixing bowls.
  2. Measuring cups - various sizes
  3. Butter Knife
  4. Measuring spoons
  5. 2 oz ice cream scoop
  6. 2 small bowls for the brushed buttermilk and the brownsugar/oatmeal topping.
  7. Large spoon for mixing

Ingredients:

  1. 1 2/3 cups all purpose flour
  2. 1/2 cup plus 2 tablespoons light brown sugar
  3. 1 tsp cinnamon
  4. 1 tablespoon baking powder
  5. 3/4 teaspoon baking soda
  6. 1/2 teaspoon salt
  7. 1 1/3 cups of Quaker Oats Old Fashioned Oatmeal (don't use the instant stuff, it doesn't stand up texturally and it's not as healthy)
  8. 1 1/2 sticks unsalted butter, cold, cut into teaspoon-sized pieces
  9. 2/3 cups chocolate chips
  10. 3/4 cups buttermilk plus a bit more for brushing on the scone (you can make your own with 1 cup whole milk and 1 1/2 tablespoons of fresh lemon juice or white distilled vinegar
  11. 1 teaspoon almond extract

Here's what you do:

  1. Preheat oven to 425 degrees Fahrenheit.
  2. Sift the flour into a food processor (if you don't have a large enough food processor, like me, mix ingredients into a large bowl.)
  3. dd the brown sugar, cinnamon, baking power, baking soda, salt. If you're using the bowl, mix the ingredients.
  4. Add the oats and pulse in FP until oats are chopped into mini flakes - barely noticeable. If you're using the mixing bowl, just stir to incorporate.
  5. Add the butter slices and pulse in the FP until the butter is in pea-sized chunks. If you're using the bowl, here's where you break out your under-sized food processor:
    1. coop enough of the mixture to fill FP to approx. 75% of it's capacity and pulse the mixture until the butter forms pea-sized bits.
    2. Empty the processed portion into a different bowl.
    3. Repeat this process until the entire mixture has been processed.
  6. Add the chocolate chips to the mixture, stir them in.
  7. Add the buttermilk to the mixture and stir with a large spoon until the dough forms.
  8. Using the ice cream scoop apportion 2 ounce bulbs of the dough onto an ungreased baking sheet. Be sure to leave about 3/4" between each scone-bulb to allow for expansion during the cooking process.
  9. Lightly brush buttermilk over the top of the scone-cookies
  10. Mix the 2 tablespoons each of brown sugar and oats together and sprinkle over the top of the buttermilk brushed scone-like contrivances.
  11. Place the populated baking sheet into the oven on the middle rack and bake for approximately 18 minutes. If you have a convection oven, change that time to approximately 13-15 minutes. Either way, begin checking these little babies 13 minutes in by poking them in the middle with a toothpick. If the toothpick comes out clean, take 'em out and spatula them onto a cooling tray right away. If you wait too long, the brushed buttermilk and brown sugar makes the scone-bulbs stick to the baking sheet - the horror!

That should do it! Let them cool for at least 15 minutes and then back away, or else you will be trampled by your children! Little do they know, they're eating something that's good for them.

Aren't we clever?

Cheers - The SPC!

Download recipe:

MSWord

Adobe Acrobat

Frittata Mangiata

I love frittatas! It's one of my go-to dishes for both breakfast and dinner. The beauty of them is that you can cobble together any leftovers you might have in the house, put them in your omelette pan along with some onions and garlic, surround them with a scrambled egg and within a few minutes, you have a flavorful melange ready to be heartily consumed.

Here's some pictures of some fritattas I've made over the years:

A Homefry, Onion, Chilli and Cheddar Cheese Frittata - Oh, My!

A Homefry, Onion, Chilli and Cheddar Cheese Frittata - Oh, My!

A London Broil, Onion and Pepper Jack Cheese Frittata with Toast Ponts slathered in Horseradish Spread and Sriracha Sauce. (no, those are not the utensils I use to eat this with.)

A London Broil, Onion and Pepper Jack Cheese Frittata with Toast Ponts slathered in Horseradish Spread and Sriracha Sauce. (no, those are not the utensils I use to eat this with.)

A Hello Kitty Fritatta made with baby spinach, onions, garlic and shredded parmesan cheese. The whiskers are brown and serve sausages, I would have added more for HK authenticity but I'm regulating my calorie intake these days. Also, homemade toast …

A Hello Kitty Fritatta made with baby spinach, onions, garlic and shredded parmesan cheese. The whiskers are brown and serve sausages, I would have added more for HK authenticity but I'm regulating my calorie intake these days. Also, homemade toast with a schmear of white fish.

So, as you can see, you can go in a variety of ways with a frittata. The one that I'll show you was one that I put together since my recent commitment to keeping track of my caloric intake. It never the less, tasted great.

Here's the ingredients:

From L to R: green peppers, chopped yellow onion, two chicken nuggets - finely diced, two brown and serve sausages - finely diced, cooked frozen corn, cooked frozen spinach, three cloves of garlic - smashed and finely chopped. In the background, one…

From L to R: green peppers, chopped yellow onion, two chicken nuggets - finely diced, two brown and serve sausages - finely diced, cooked frozen corn, cooked frozen spinach, three cloves of garlic - smashed and finely chopped. In the background, one egg, prior to scrambling and grated pecorino romano cheese (not pictured).

Here's the recipe:


Hardware:

  • 10" non-stick omelet pan
  • lid for pan, preferably glass (so you can see the frittata without lifting the lid)
  • thin spatula (see hardware)
  • small bowl
  • fork
  • cutting board
  • 6"-7" chef's knife

Ingredients:

  • 1/4 cup diced green pepper
  • 1/4 cup diced yellow onion
  • 1/4 cup cooked yellow corn
  • 1/4 cup cooked chopped spinach
  • 2 chicken nuggets diced
  • 2 brown and serve sausages diced
  • 3 cloves of garlic finely chopped
  • 1 large egg, scrambled
  • salt and pepper to taste
  • 2 tbsp grated pecorino romano cheese
  • Frank's Red Hot sauce to taste

Here's what you do:

  1. prepare the ingredients as per description
  2. heat pan over moderate-low heat for approx 1 minute.
  3. add 1 tbsp of olive oil to the pan
  4. add the onions and peppers to the pan and season with salt. Saute' until onions are sweating.
  5. add the garlic and saute' for another minute
  6. add the spinach and corn, stir to incorporate all of the ingredients
  7. add the meat and stir yet again. season with salt and pepper
  8. let mixture simmer in pan, stirring occasionally for approx. three minutes to get pan up to egg scrambling heat.
  9. If needed, add oil to the pan so that the eggs don't stick once they're in the pan
  10. add the eggs, evenly distributing over the entire mixture. If you miss a spot, just nudge some of the uncongealed egg over to fill.
  11. once the entire mixture is incorporated with the eggs and the eggs start to congeal, lower the heat and cover the pan with a lid.
  12. Let the mixture sit in the pan for at least 2 minutes. Check from time to time to see how it's doing. 
  13. Once the egg's have completely cooked, it's time to plate this bad boy!
  14. Slide the frittata onto a plate and sprinkle the grated cheese on top. 
    NOTE: you may have to release the frittata from the pan with a spatula by pressing down under the frittata toward the middle, repeating around the perimeter.

Here's the resultant delicacy:

This actually is pretty healthy too!

This actually is pretty healthy too!

One of the great things about this kind of dish is that it can be customized to suit your kid's tastes and diet. Also, if you use a bigger pan (requiring more ingredients and more eggs, BTW) you can cut it up like a pizza and serve slices.

Whatever size you make it, this versatile wonder is definitely a must-have in the Single Parent Recipe Book.

Downloadable Recipe:

MSWord

Adobe Acrobat

Leftover Beauty - Vol. 1

This is your friend.

This is your friend.

This is where being frugal meets creativity. As a single parent chef, many of us need to save money and one way to do this is to re-purpose leftover food from the night before. This posting's leftover revamp involves baked potatoes.

Baked potatoes are not only a great side dish for dinner for also serves as a marvelous add-on to breakfast as home fries.

Here's how to make them:

Hardware:

  • 10" cast iron pan
  • 5" Chopping Knife
  • Cutting board used for vegetables/fruit (not animal protein)

Software:

  • 2 medium sized left over baked potatoes
  • 1/2 onion
  • 1 tbsp butter
  • 1 tbsp vegetable oil

Process:

  • Preheat pan over medium heat and drizzle vegetable oil into the pan
  • Cube the onions and potatoes

When cutting a baked potato, please keep in mind that the skin is harder to cut than a raw one. Be sure your knife is sharp and that you take your time.

Onions are a bit easier to cut but still be careful, especially when making the horizontal cuts.

  • Put the tablespoon of butter into the pan, spread it around throughout and then add the onions. Fry until they are translucent.
  • Add the potatoes into the pan, add salt, pepper and other spices to your liking. Spread them evenly over the surface of the pan. Let them sit for approx. 5 min. 
  • Flip the potatoes over and let them fry for another 5 minutes.
  • Once they are browned to your liking, plate them with your favorite egg dish.
These are done, plate them with your favorite egg dish. Mmmmmmm boy, it's good!

These are done, plate them with your favorite egg dish. Mmmmmmm boy, it's good!

Grilled Cheese Mania!

A moving experience

Grilled cheese sandwiches are a go-to dish for a quick dinner. In their most basic form they're just two slices of bread with American cheese. Even something as simple as that is delicious. But what I'm going to show you today is transcendent!

This particular version features two cheeses - sharp cheddar & Pecarino Romano and two meats - hard salami and leftover London Broil. Granted, the palate for this version skews a bit toward the teenage/adult side, just remember that you can mix things up to cater to younger tastes. 

What's most useful in this recipe are the techniques I use - instead of using whole slices of meat, I cut them thin so that you don't accidentally pull out a huge slab of meat on your first bite. In addition, I grate the cheese so that it melts quicker.That way, you don't have to leave the sandwich on the grill just to wait for the cheese to melt.

Also, the order of ingredients in the sandwich is important. You want to put condiments on both sides to get full flavor impact and ingredients prone to slippage do best, in my opinion, when placed next to the cheese which acts as a kind of culinary glue.

Okay, enough of my grilled cheese science, let's get to cooking!

Grilled Cheese Mania Sandwich

Hardware:

  • 10" cast iron pan or any non-stick pan of the same size. The heavier, the better so as to retain/regulate the heat from the stove.
  • Long, thin spatula - this is very important for flipping. See my Hardware section for particulars.
  • 6-10" chef's knife
  • Cheese grater
  • Butter knife
  • Cutting board and paper plates.

Software:

  • Two slices round Italian bread (or rye)
  • Imitation butter spread or soft, salted butter
  • Red onion - thinly sliced
  • Horseradish spread (you can substitute with mustard and/or mayo)
  • Salt
  • Pepper
  • 3/4 cup sharp cheddar cheese (grated - approx. 3 oz chunk)
  • 1/4 cup Pecorino Romano cheese (grated - approx 1 oz chunk)
  • Sharp hard salami - sliced into thin strips
  • London Broil - sliced into thin strips.

How It's Done:

Prepare all of your ingredients before actually cooking the sandwich. In French cooking they call this mise en place.

The ingredients

Preheat your pan over medium-low heat. You don't what a super hot pan for this. More on this later.

Select two matching slices of bread from the middle of the round loaf, place them face to face on your cutting board and butter the top side of the top slice.

Place the buttered side of the bread onto the pan. When the slice hits the pan, it should sound like this:

What your bread should sound like when you put it in the pan for making a grilled cheese sandwich.

Now things should go somewhat quickly since your bread is being toasted.

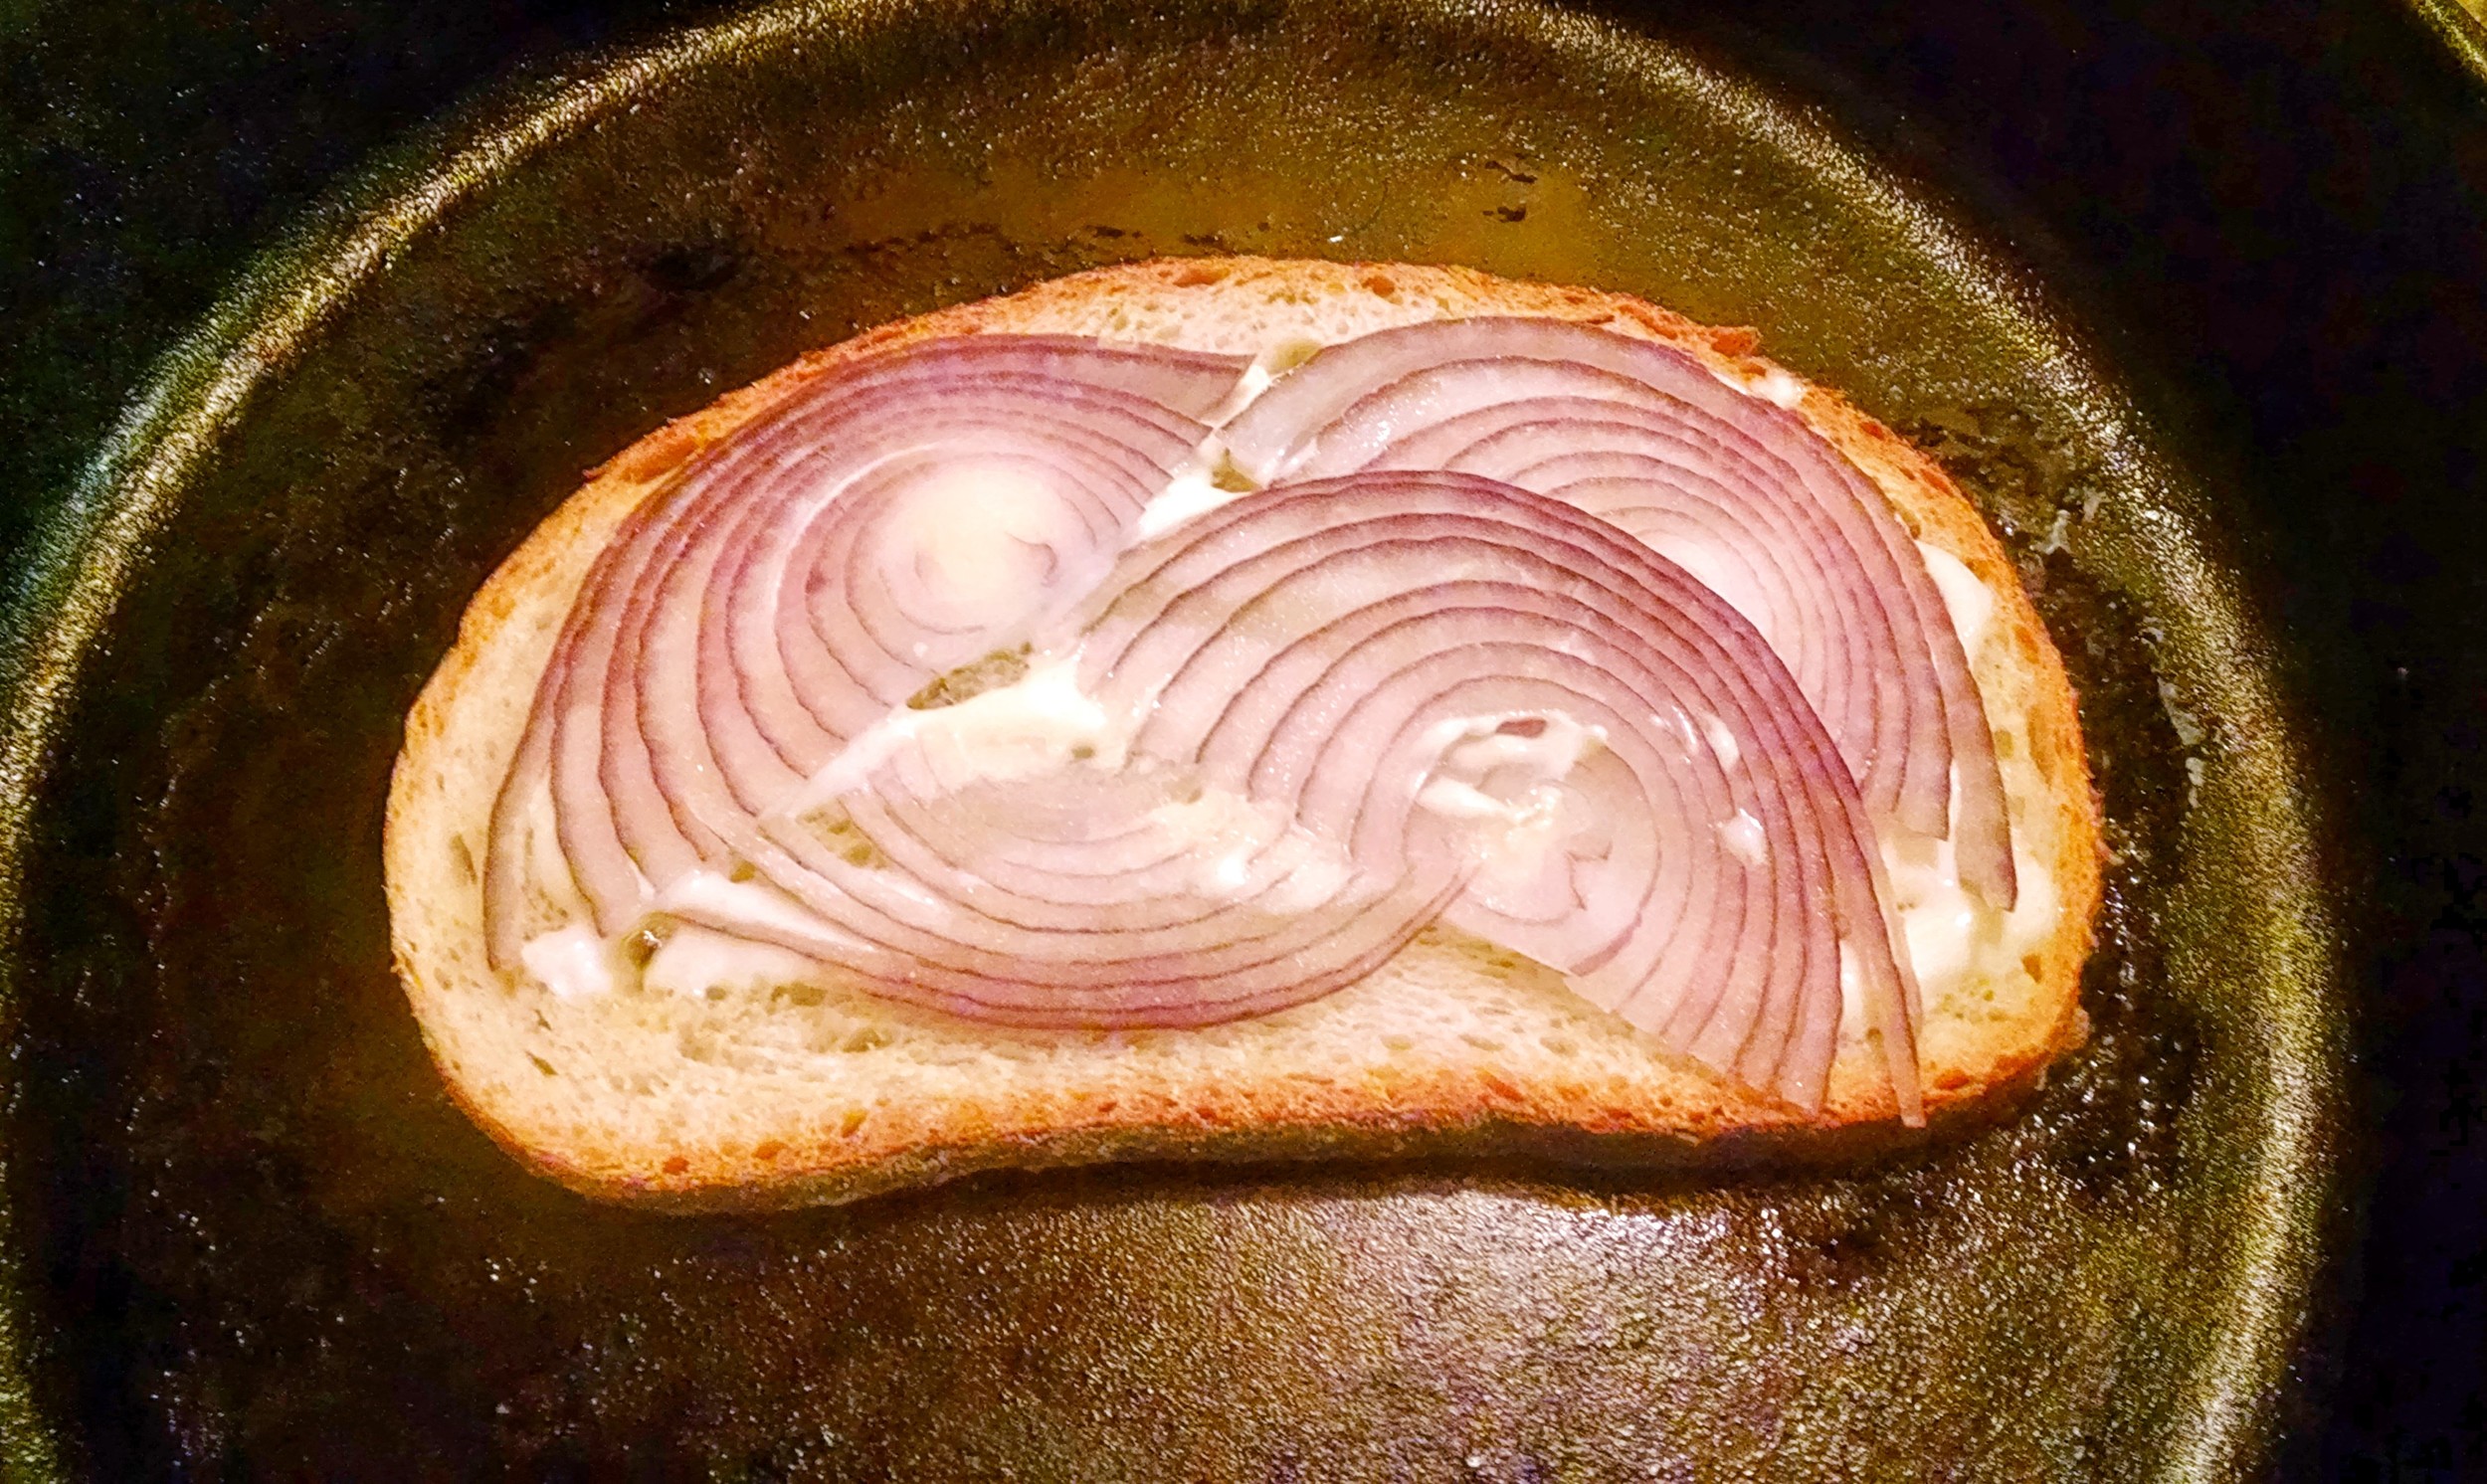
Squeeze some horseradish spread onto the slice of bread, smooth it out with the back of a spoon. Then lay the slices of onion on top of that.

Onions on!

Add salt and pepper (just a bit, flavors will add up as you layer the ingredients)

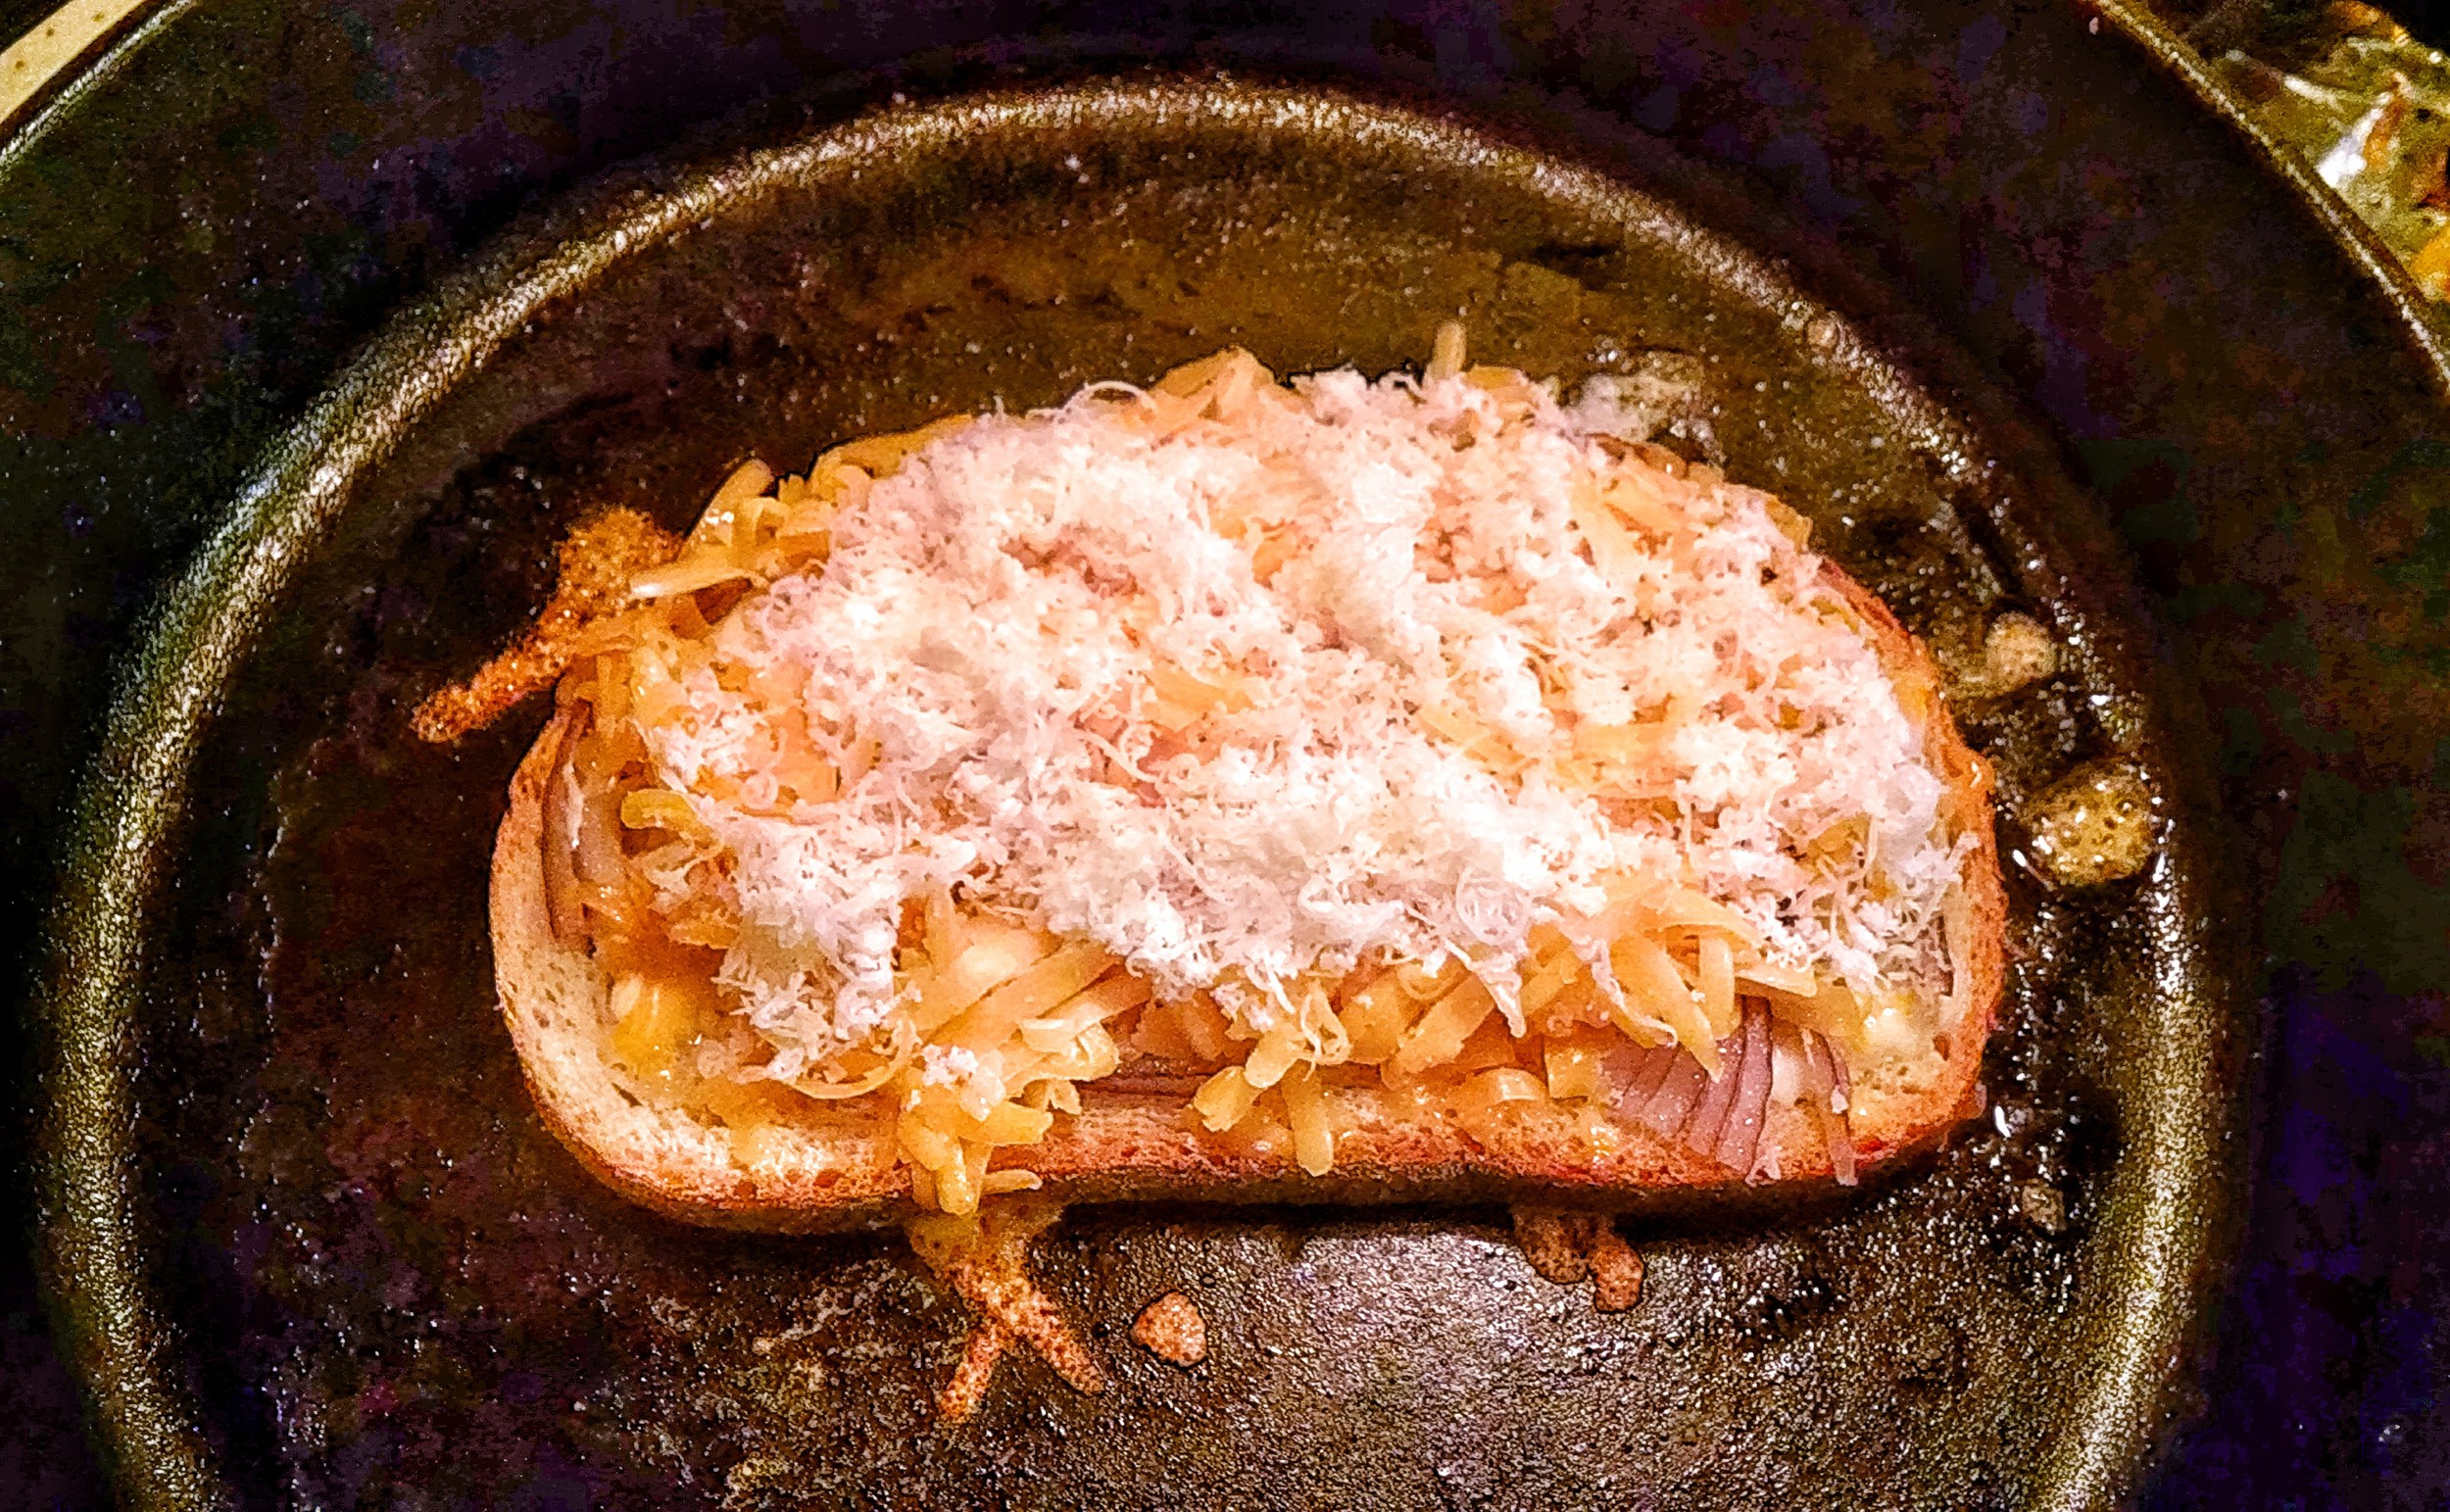
Lay the grated cheddar and 1/2 of the Pecarino Romano cheese onto the onions.

Two cheeses

Once you've got the two cheeses in place and they start to melt a bit (look to the edges for meltage), place the two sliced meats on top, salt a pepper again.

Oh, mama! I wanna eat, now!

Oh, mama! I wanna eat, now!

Sprinkle the remaining Pecorino Romano cheese over the meats and squirt some more horseradish sauce over that.

We're getting there...

Now, flip over the bottom slice of bread and butter the newly exposed side. Place that slice, butter side up, on top of the sandwich and gently press down on it. There will be some seepage and sizzle - don't worry, it's all good.

Press lightly, my friend...

Press lightly, my friend...

Now we're at the moment of truth, it's time to flip the sandwich over. Before you do, you need to lift the sandwich up high enough for you to look under it to see if it's done. If it is (it should be a nice golden brown), then place your long spatula down the middle of the sandwich lengthwise. (Here's a picture of an already flipped sandwich with the spatula holding the sandwich in flipping position.)

I should have taken this pic prior to flipping, my bad.

I should have taken this pic prior to flipping, my bad.

And with the sandwich elevated approx 3-4 inches above the pan, simply (ha! simply he says!) rotate your wrist quickly to flip the sandwich. Go ahead, you can do it....go ahead! NOW!!!

Now we have a flipped sandwich and you should be hearing that sizzle yet again. If bits have flown out, just push them gently back into the sandwich or just go ahead and give your self a pre-meal nibble (be careful, it's hot!).

Now the rest is simple, just wait about 3-5 min and then give the underside a check like you did before. If it's ready, take the sandwich out of the pan and place it on the cutting board to sit for another 5 minutes. I said wait! ;)

Don't cut it just yet...

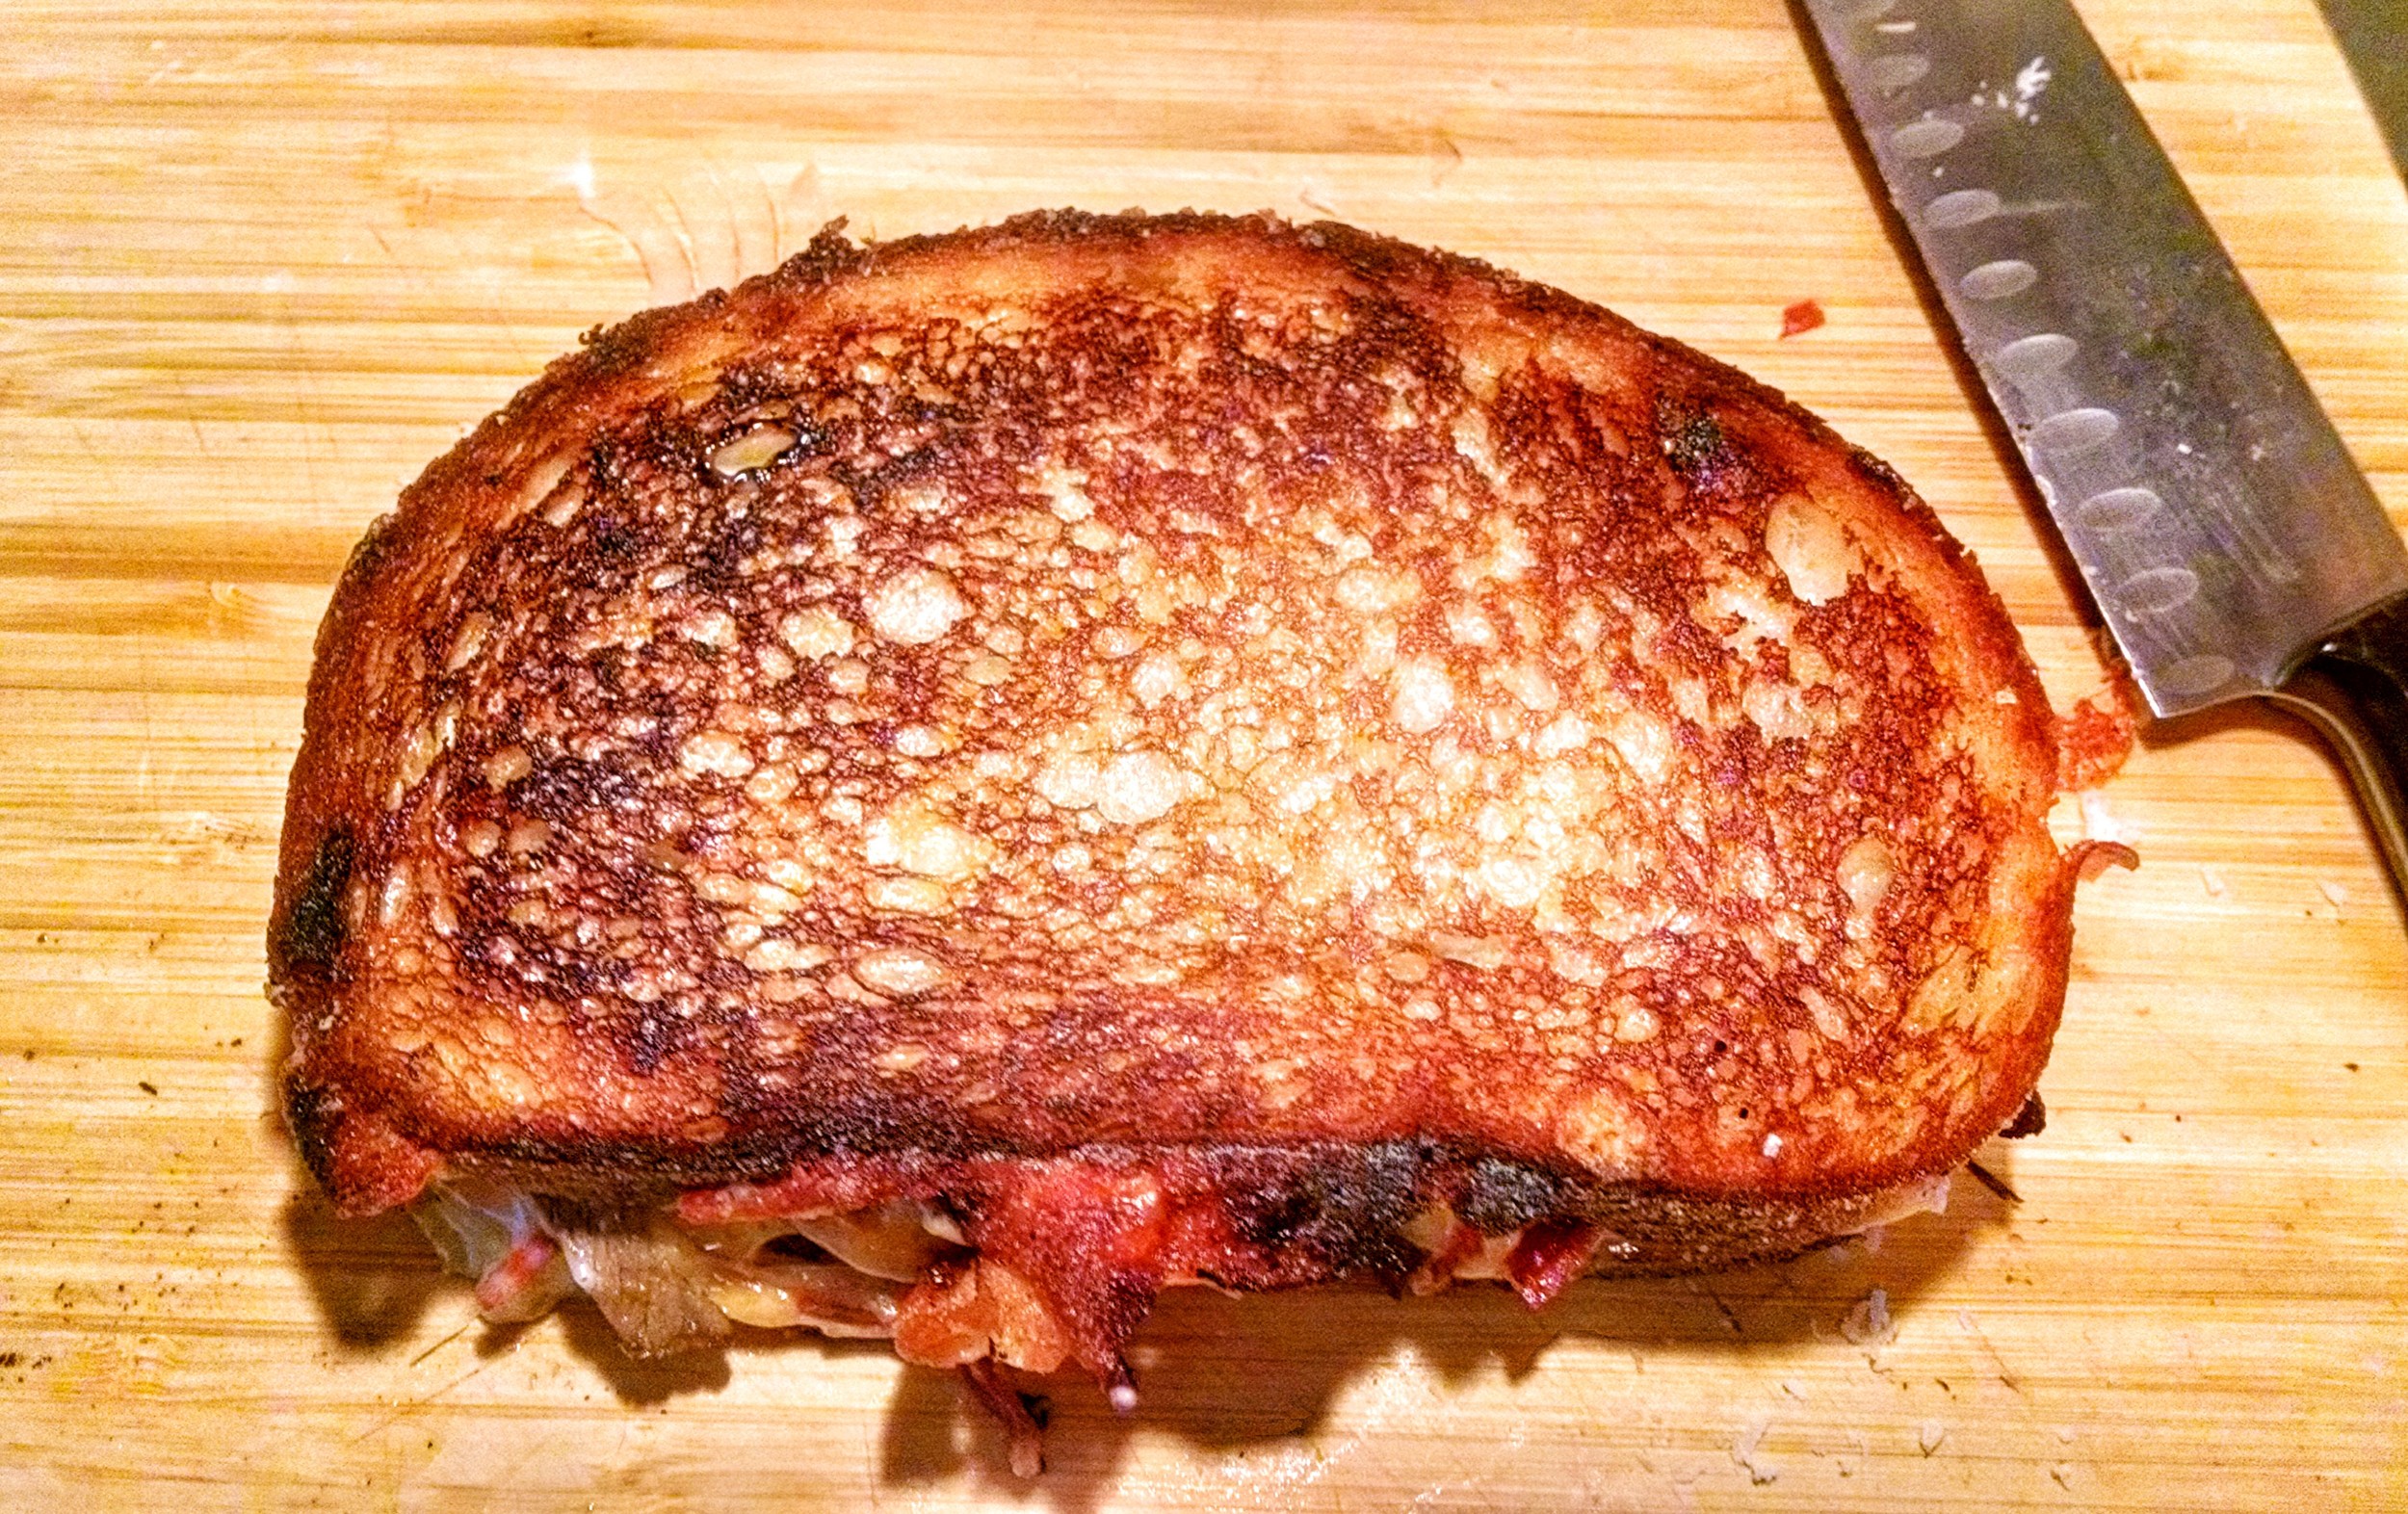
Once it's been sitting for 5 minutes, go ahead and give it a cut. There will be crunching and there will be joy throughout your house as this beautifully simple gem is made ready for consumption! Huzzah!!!

Melty goodness!

Melty goodness!

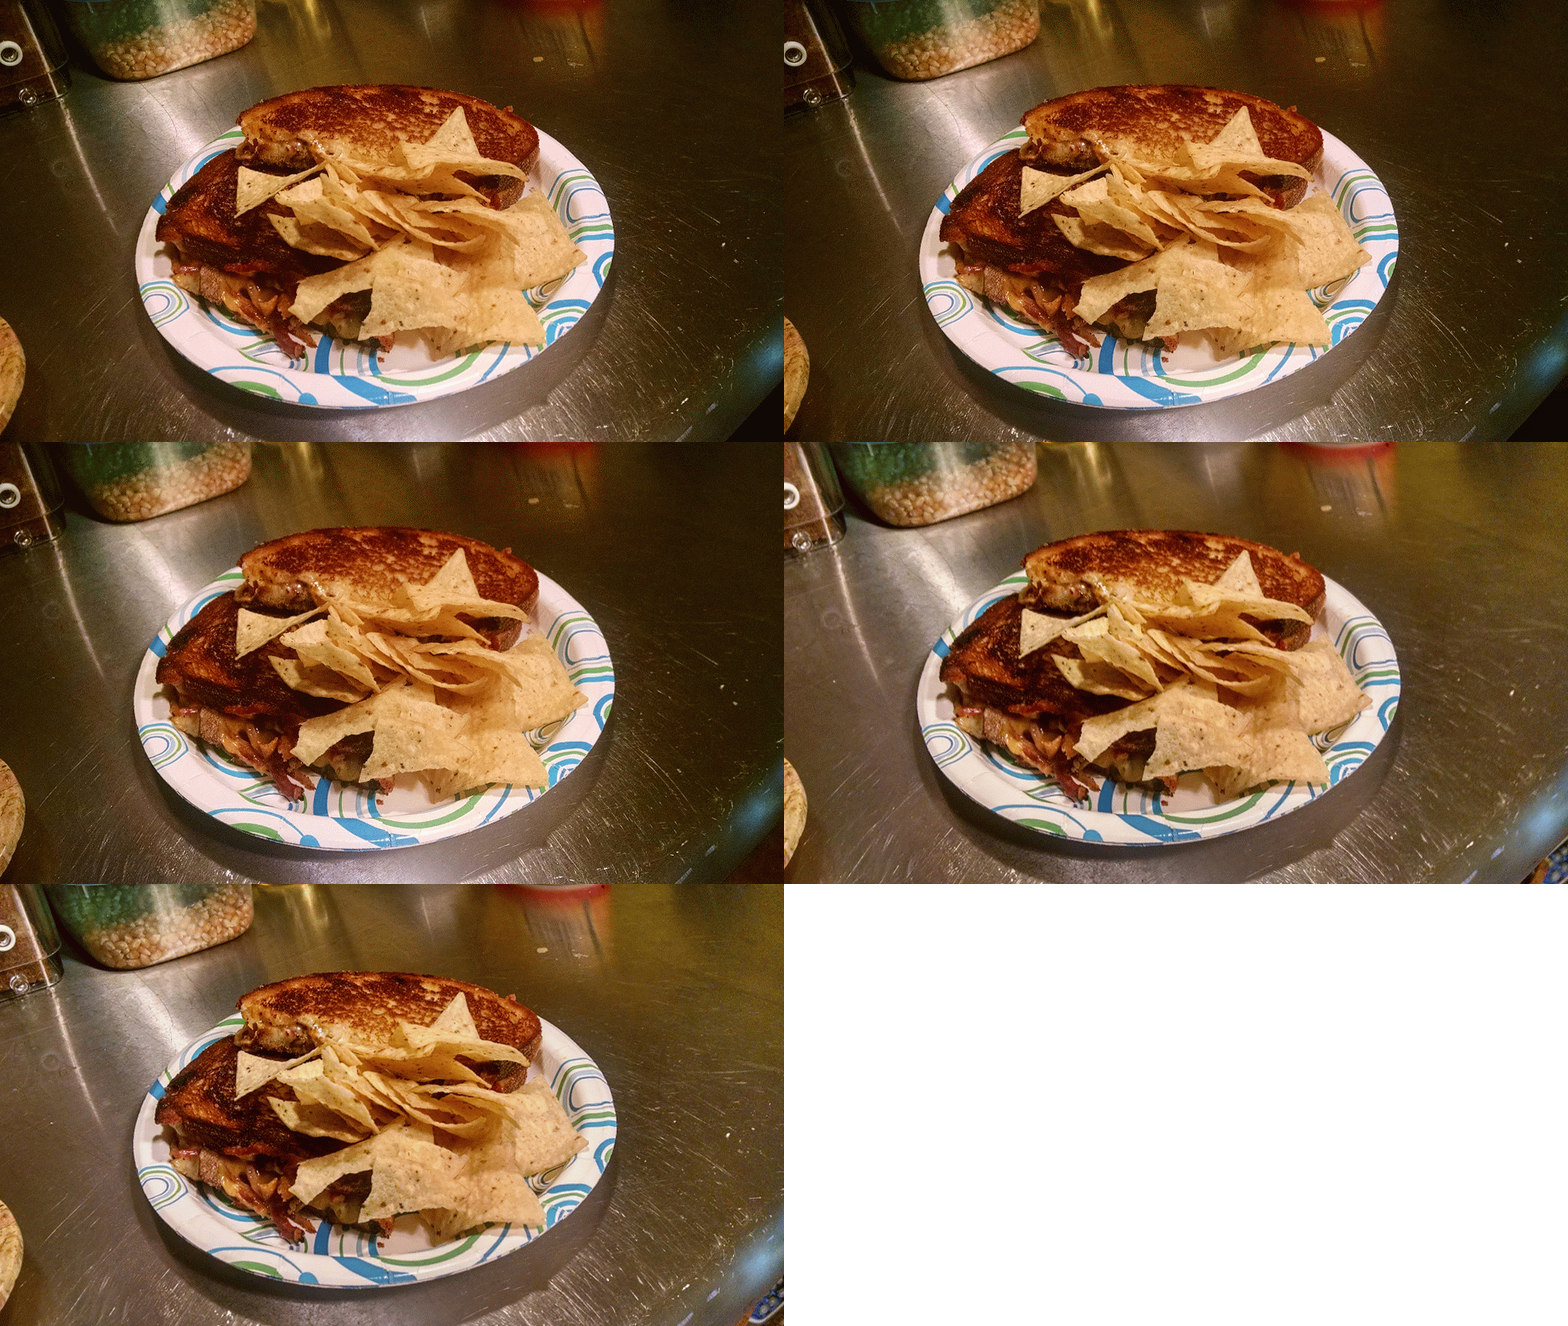
Just park this bad boy on a paper plate with some chips and you're ready to go - go and have a blissful moment of culinary joy, that is!

And remember, you can use more kid-friendly ingredients to suit your family's tastes and lastly, please experiment with various ingredients and condiments. This stuff is fun!

Enjoy!

Nurture!

Cheers - SPC!

Side Note:

Most of the time there'll be crunchy bits of melted cheese on your frying pan. DON'T THROW THEM OUT! These bad boys taste fantastic!. Just lift them off your pan with a spatula and give them a few seconds to cool down and then crunch away!


Baked Potatoes - In Half the Time!

Potatoes are done!

Baked potatoes are a wonderful side dish and depending on what you cover it with, can be the whole enchilada in terms of what's for dinner. But the big problem was that it took a good 60 minutes to prepare and sometimes we don't have that on a busy day.

But now I've found a recipe that cuts that time in half (at least) and opens up the possibility of having these healthy nuggets of love in the midst of a hectic week.

Here it is:

Baked Potatoes (nuke & bake)

Hardware: cookie sheet, aluminium foil, small knife.

Software: potatoes for baking (russet, Yukon Gold, red, etc...), olive oil, salt, pepper.

Process:

  • Wash the potatoes thoroughly under luke-warm water. This way any dirt on the potato will loosen and fall off more easily.
  • Remove any blemishes (eyes) from the potato using a small, sharp knife - be careful!
  • Pat the potatoes dry, place them on a microwave-safe plate and nuke for approximately 5-7 minutes or until a fork will sink into the potato's flesh easily about 1/4 of an inch.
  • Prep the potatoes for the oven by covering with olive oil and sprinkeling with salt and pepper.
  • Put the potatoes in a 400 degree oven for 20-25 minutes. Then check to see if they're done: you can tell when a fork enters the potato easily and the weight of the potato is enough for it to slip off the fork (see video).

There you go! A well-prepared baked potato in at least half the time. Not only is it quicker, is saves on energy and that's a good thing too!

Homemade Machine Bread (without the paddle hole!)

Smells sooooooo good!

Smells sooooooo good!

Hold on! Before you purists go running away or you newbs tremble with fear, this way of making bread takes care of two issues: 1) control of ingredients and 2) ease of preparation. So I'm thinking that both groups can save some time and be a caring parent at the same time, how's that?

I've been toying with this recipe for about three years now, the original came from Allrecipes.com - a great resource for common-person recipes. Since then, I've tweaked it enough to warrant my own posting. So here it is:

Hardware:

  • 2 cup measuring cup

  • Measuring spoons (1tbsp and 1tsp)

  • Quick read thermometer. I recommend the CDN DTQ450X ProAccurate Quick-Read Thermometer

  • Medium sized mixing bowl

  • Food scale that can be zeroed out.

  • Bread makeing machine that has a dough mixing setting

  • Cutting board

  • 9" bread pan

  • Parchment paper

  • Oven

Software:

  • 7/8 cup hot water (between 105°-120°)

  • 2 tbsp of honey

  • 1 - .25 oz packet of Fleischmann's Active Dry Yeast

  • 2 cups Aashirvaad Atta flour (this is finely milled whole wheat flour that makes the bread tender)

  • 1 cup Bread flour

  • 1 tsp of salt

  • 1/4 cup of vegetable oil (I use canola)

  • 1 tbsp of melted butter

Here's how you do it:

  • Measure 7/8 cup of hot tap water into measuring cup and take it's temperature, you'll want it to be near 120 which is at the high end of acceptable yeasting temperature. I'll explain why in a minute.

  • Add the 2 tbsp of honey to the water and mix thoroughly.

  • Pour the honey/water mixture to the bread maker pan (the temperature will drop about 7-10 degrees, hence the need for the 120° degree water.)

  • Sprinkle the contents of the yeast packet all around the surface of the water. If you have the time, you should watch what happens at this point. The little granuals of yeast sink to the bottom of the pan and then after a few moments bloom back up to the surface. IT IS ALIVE!!! Ah, the wonders of nature and cooking!

  • Let the yeast mixture sit for approximately 10-15 minutes until it’s “Mr. Foam”:

Mr. Foam!

Mr. Foam!

  • While Mr. Foam is getting his act together, you can measure out your flour. I use measurement by weight becuase it's much more accurate and yeilds consistent results. Here's how to do that -

- Place your bowl on top of your scale and Tare (zero-out) bowl's weight, like so:

- Add the 1 cup Atta flour till it weights 240 grams.
- Zero out the scale again and add 120 grams of bread flour. That's it!

  • Add 1 tsp of salt to the flour mixture.

  • Once Mr. Foam is ready, add 1/4 cup of vegetable oil and 1 tbsp melted butter to Mr. Foam.

  • Add the flour mixture to bread maker pan.

  • Set bread maker to the dough mixing setting and start it up! It looks like this:

  • 90 minutes later, it's time to do some light kneading. The idea is that the bread maker has done the lion share of work so we're just going to help it along into the bread pan. Here's how:

- Take the dough out of the mixer and flatten it out onto a cutting board -

Flattened Dough

Flattened Dough

- Fold thusly:

Fold in thirds.

Fold in thirds.

- Rotate dough 90 degrees and flatten once again.

- Then fold as before.

- Finally, gently roll your bread friend around (bread is friendly, mind you) to seal the seams created by the folding. After about a minute of doing this, it should look like this -

Rolled and ready!

Rolled and ready!

  • Drip some vegetable oil into the bottom or your bread pan and place a 6" strip of parchment paper across the middle of the pan. Like so -

These strips help in taking the finished bread out of the pan.

These strips help in taking the finished bread out of the pan.

  • Place the dough gently into the pan and place in an unheated oven for 1 hour.

  • After an hour, the bread will rise. It will look like this -

It rises!

It rises!

  • If you have a convection oven, as I do, you can just set the temperature to 375F and the timer to 35 minutes and let 'er rip. If, on the other hand, you don't have a convection oven, gently take the bread out of the oven and preheat to 375F. Then put your bread back into the oven for 35-40 minutes.

  • 35-40 minutes later, you should have something like this -

Nice kitty!

Nice kitty!

  • Oops! Sorry, that's our cat stealing the show, as I said, it should look like this -

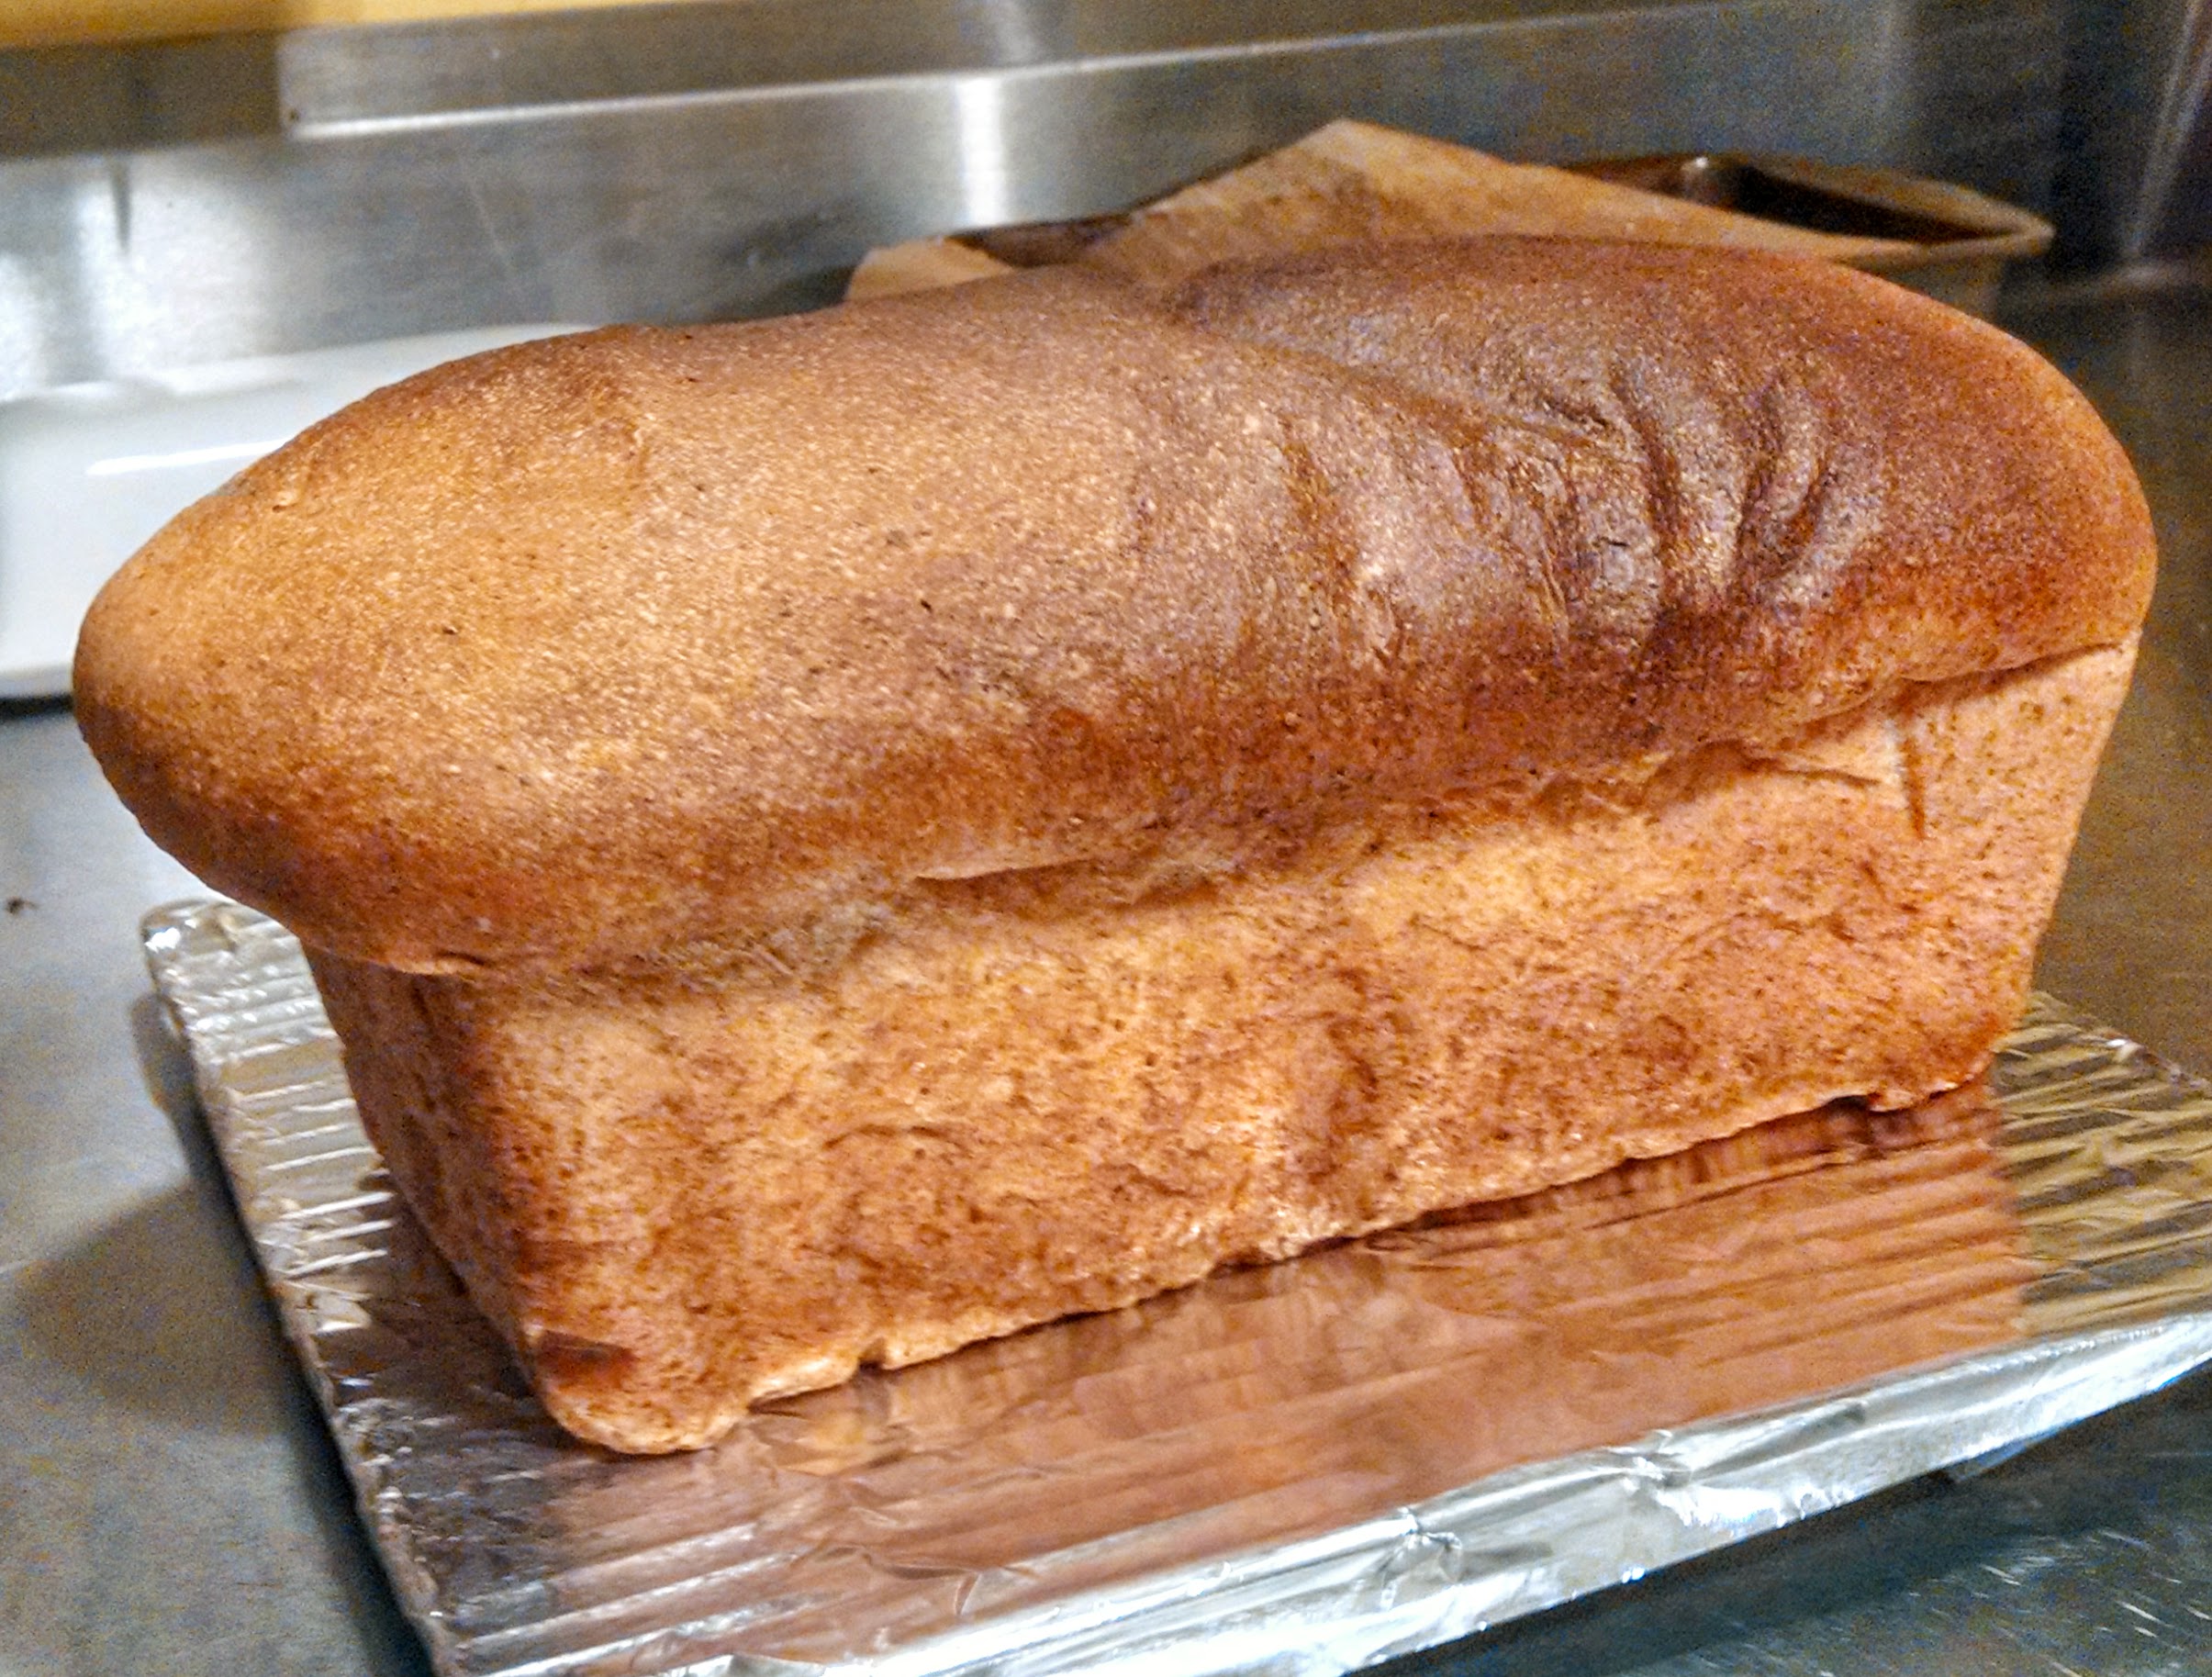
Bun and done!

Bun and done!

  • Let it cool on the counter until it is room temperature - at least a couple of hours before you start to slice this bad boy up. I actually wait over night so that the innards have toughened up a bit and aren't prone to ripping during the slicing process.

Some notes:

As you might surmise, this is not a hard and fast science. Feel free to experiment with different flours, substitutes for the sugar in the yeast mixture, etc... 

I highly recommend that you get a bread box to house your finished bread, a bread slicing guide and a serrated bread cutting knife for slicing. The key with the knife is that the blade needs to be long enough to allow for clearing the width of the cutting guide with room for the sawing action.

And lastly, I cannot express the amount of satisfaction and feeling that you are doing something good for your family when a loaf of bread comes out of the oven and it's sliced up ready for your kids to make their grilled cheese and PB&J's! Just a quick glance at the list of ingredients on a package of store bought bread should bring that notion home!

Enjoy!

Enrich!

SPC

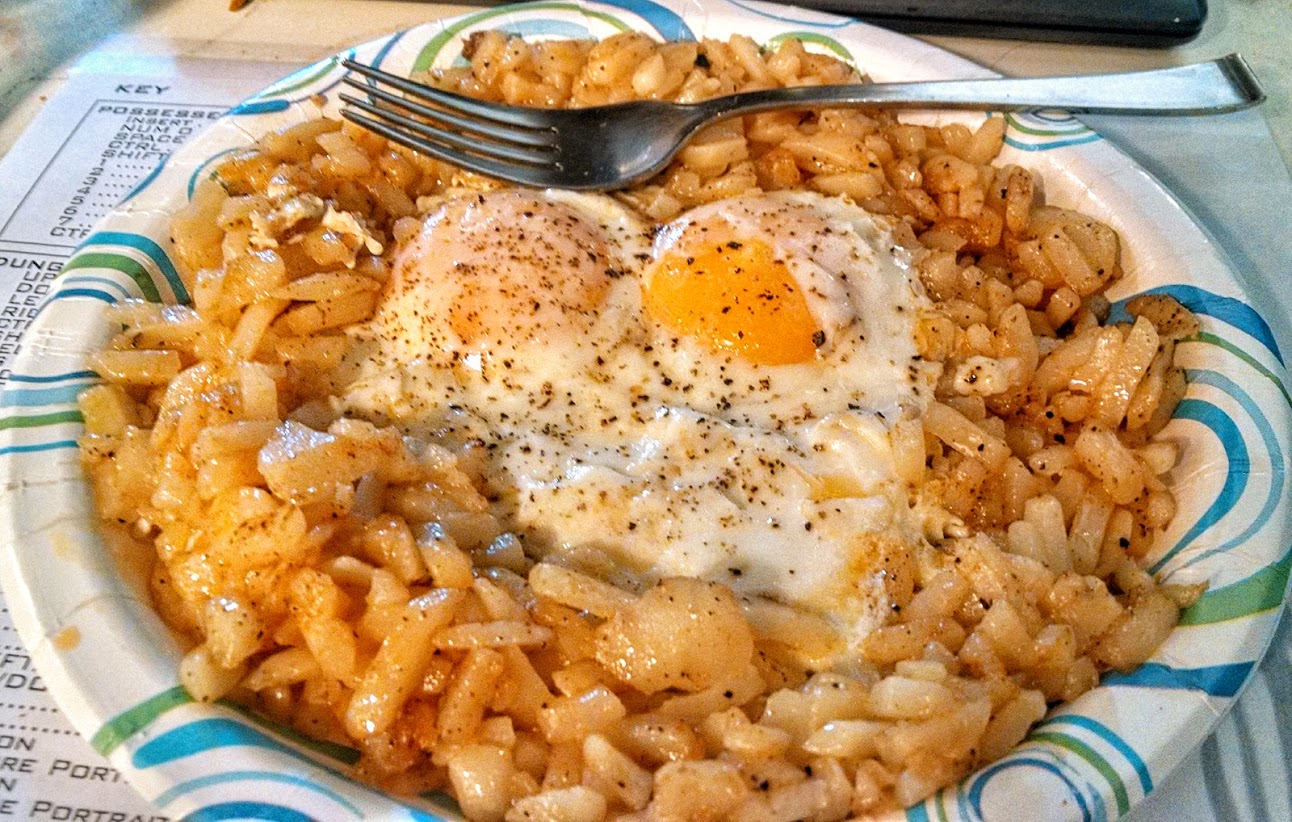
Bird's Nest Eggs & Solo Toast

No! This is not some wild concoction made from a real bird's nest! Yes! There are recipes that do that!

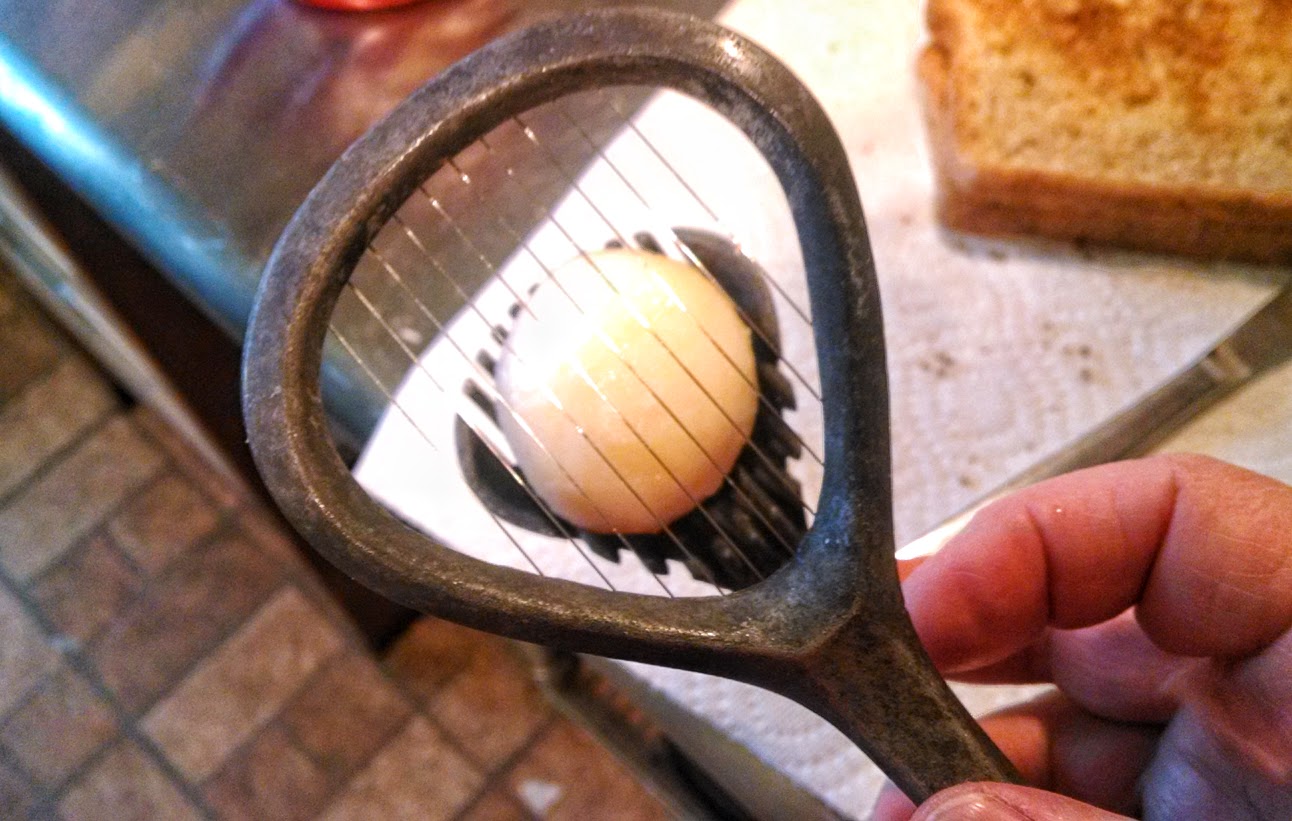
This is a recipe I love to make for breakfast on a Saturday or Sunday morning for the family. It makes use of a hard boiled egg slicer and includes a tasty twist on toast.

Two egg nest.jpg

Here's what it looks like (this is a batch that I made previously.):

So here's how to make them:

Hardware: 10" sautee pan, hard boiled egg slicer.

Ingredients:

Bird's Nest Eggs:

  • 1 Can Whole New Potatoes (sometimes called White Potatoes) - 14.5 oz can
  • 1 - 2 eggs
  • Approx 1-3 tbsp oil (I use olive, but any vegetable oil will work)
  • Approx. 1/2 tbsp of butter
  • Seasoning to taste (I use an Emeril Lagasse blend, salt and pepper works fine)

Solo Toast (so good you could eat it by itself):

  • 2 slices of whole wheat toast
  • 1/4 tbsp butter
  • Approx 1 tbsp of soft bleu cheese (Gorgonzola works great)
  • 1/2 tsp of Dijon mustard

Let's Make It!:

1. Prep the potatoes by slicing them one way - 

slice 1.jpg
  • And then the other -
  • Then put them in the pan on medium heat for about 5 minutes (this is about 2/3 of the can, you can use more, NP!) -
It begins!

It begins!

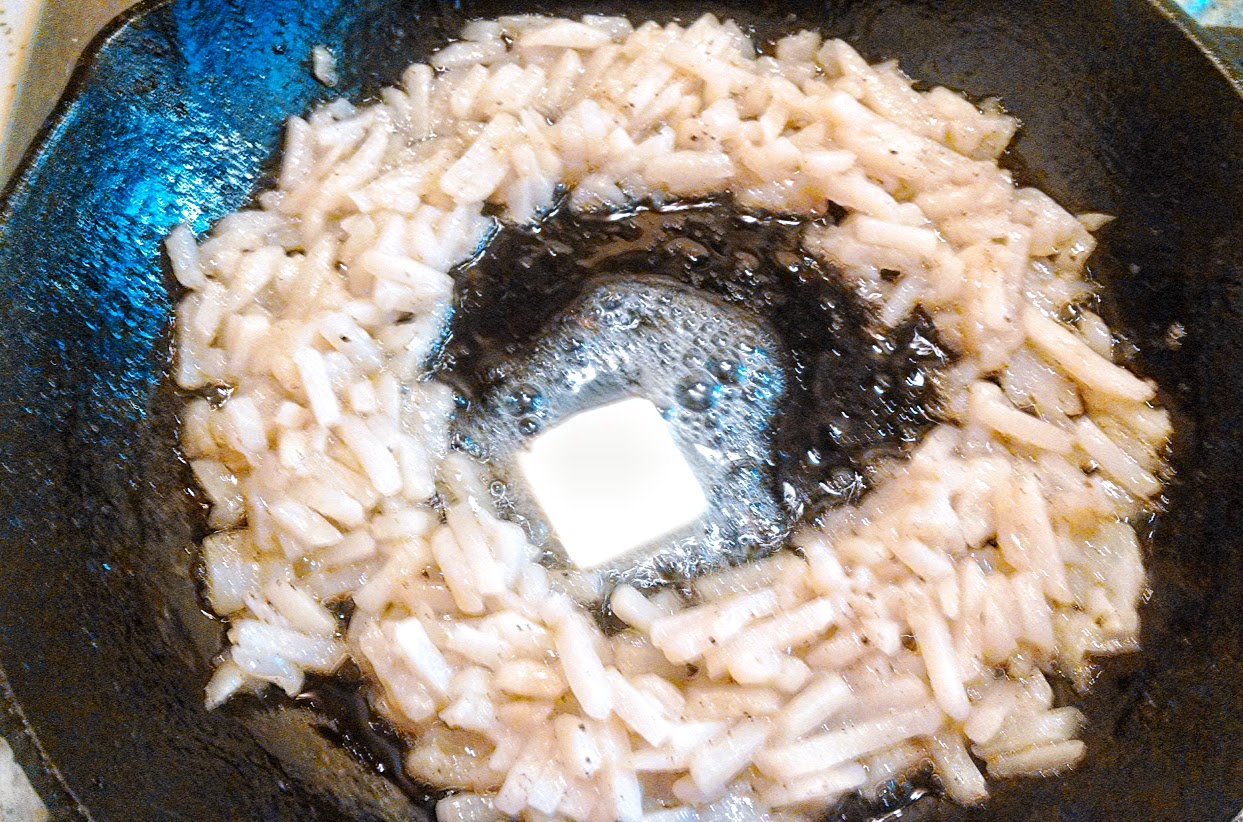
  • Once the potatoes are warmed up and bubbling, "Make A Hole!" and melt a tab of butter inside it -
Egg landing pad

Egg landing pad

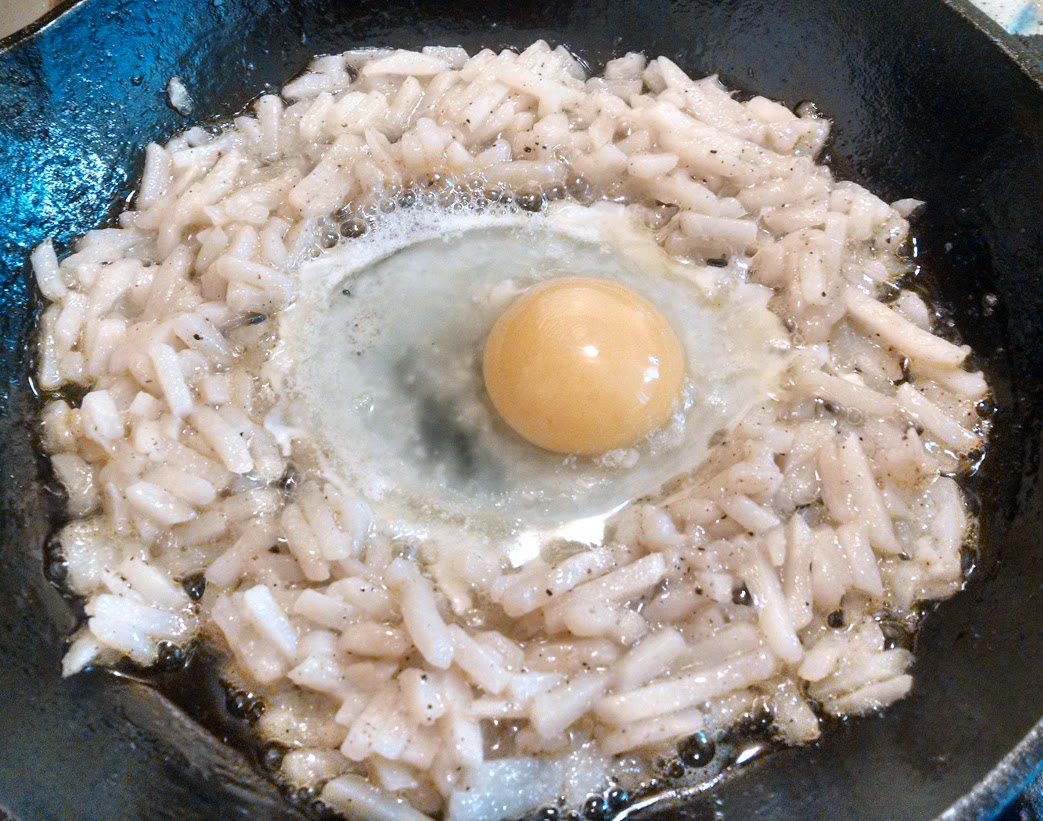
  • Once the butter is melted and the pan is still sizzling, crack the egg into the hole -
Nestariffic!

Nestariffic!

  • Season to taste and let the egg cook for 1-3 minutes, at that point, invade your bird's nest and flip the egg over for over-easy doneness (this pic is post-flip) -
Over-easied!

Over-easied!

  • And plate that mo-fo! -

Eggs are done, let's do the toast, shall we?

Solo Toast:

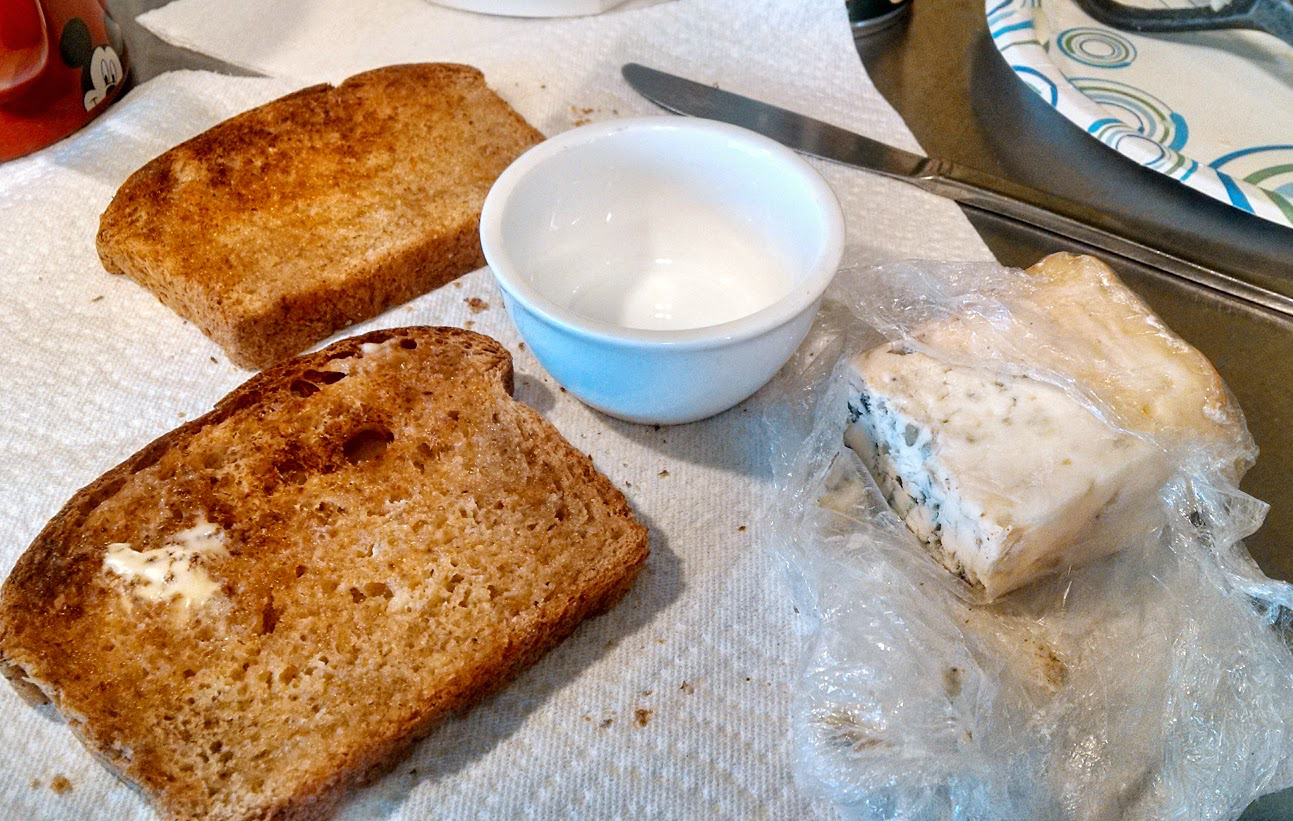
  • The Players LtoR: buttered toast, a small bowl and gorgonzola cheese or some other kind of tasty bleu cheese; not pictured - Dijon Mustard (had a previous engagement) - 
the players cropped.jpg
  • Put cheese into small bowl and microwave for 10 seconds (I have a 1100 watt oven) - 
  • Mix melted cheese with mustard (looks 'iffy' but tastes GREAT!) -
Looks "iffy" but tastes GREAT!

Looks "iffy" but tastes GREAT!

  • Spread on the toast -
  • Cut the toast and assemble the final dish -
Get the hot sauce, I'm ready to dive in!

Get the hot sauce, I'm ready to dive in!

Enjoy!

SPC


Leftovers For The Win!

Just a quickie (those are always fun ;), I had some left over Brussel sprouts and a baked potato from last night. So I decided to do a quick mini-feast for breakfast. Here's how it went:

Software: Additional ingredients needed: 1 clove garlic, 2 green onoin finely chopped, 2-3 tbst oil, 1 tbst butter, salt and pepper or your favorite spice blend for savory cooking.

Hardware: 10" saute pan (preferrably a well-seasoned cast iron pan)


  • Heat  a 10" saute pan over medium heat
  • Cut sprouts into quarters - set aside
  • Cut baked potato into similarly sized pieces - set aside
  • Crush a clove of garlic - set aside
  • Add 2 tbsp of olive oil to pan
  • Once a sacrificial piece of potato sizzles right away when dropped into the pan, immediately add prepared ingredients and sautee until sprouts soften and potatos lightly brown
  • Season to taste with salt and pepper (or your favorite blend)
  • Raise heat to medium high till oil starts to actively bubble
  • Add 1 tbsp of butter to pan, stir.
  • Scramble two eggs with approx 1 tbsp of water.
  • Add eggs to mixture in pan and let sit for approx 30 seconds
  • Turn mixture over with a spatula so eggs cook thoroughly
  • Once eggs are cooked - plate your concoction
  • Garnish with chopped green onion and sriracha (of hot sauce of your choice)
  • EAT!!!


Shish Kabob, Baby!

The other day I had told my students in one of my classes that I had no idea what to make for dinner that night. One of my students who was a good cook suggested that I make shish kabob with coconut rice. This turned out to be such a good idea that I made it twice that week! The other thing that is fantastic about it is that its really quite easy.

Here's the recipe:

Ingredients:

Kabob:

2 boneless skinless chicken breasts cut into 1/2 inch cubes

2 green peppers or any color pepper - your choice

1 12oz box of white mushrooms

1/2 a medium sweet onion (or yellow if you like a more pungent onion flavor)

Shish Kabob skewers (soaked in water for at least 1 hr)

Marinade:

8 tbsp of soy sauce

3 tbsp of maple syrup

3 cloves of garlic, crushes and finely chopped

1/2 tsp crushed red pepper

1 tbsp Worchestershire Sauce

Coconut Rice:

1 13.5 oz can of Goya Coconut Milk

1 1/4 cups of water

1 1/2 cups of Carolina Rice 

1 tsp of sugar

Pinch of salt

What to do:

Make the marinade and get the chicken into absorb mode:

Combine all the marinade ingredients in a medium sized bowl and mix thoroughly with a whisk.

Pour over chicken in a large bowl and let marinade in refrigerator for at least 1 hour.

Start the rice:

Pour the coconut milk, water, sugar and salt into medium sized pot and stir until the sugar and salt have completely dissolved.

Rinse thoroughly the rice in a large strainer until the water passing through it runs clear.

Put the rinsed rice into the pot and stir to combine.

Place over medium high heat and bring to a boil.

Once boiling, reduce heat to very low, cover the rice at a slow simmer for 18 to 20 minutes.

Once time is up, remove from heat and leave covered until your ready to serve it.

The veggies:

Once the rice starts simmering, it's time to cut the veggies into 3/4 inch pieces. Put aside in fridge until the hour marinade time has completed.

Assembly:

Place the ingredients in front of you on a large table.

Retrieve the skewers from their soak, placing near the veggies and chicken.

Assemble the kabobs by skewering the veggies and chicken in rotation. I place the first piece at about 2 inches away from the end so as to make a handle for the kabob. I follow this order:
1) pepper
2) onion
3) mushroom
4) chicken.

Repeat until there's about an inch left open at the end of the skewer.

Place completed kabobs on a plate. This recipe makes about 10 kabobs with chicken and about 2-3 more simply veggies.

Put a grill pan over medium high heat for approx 5 minutes or until the pan just starts to smoke.

Drizzle Canoloa oil on the pan.

Carefully place the kabobs on the grill pan perpendicular to the pan's grid.

Drizzle some more Canola oil over the kabob, sprinkle some salt or your favorite rub over the kabob and drizzle some Worchestershire Sauce sparingly over the kabob. Sizzling will ensue.

After 5-7 min, carefull turn over the kabob to cook on the opposite side.

Let it cook for another 5-7 minutes.

At this point please check the chicken to make sure it is cooked. Some pieces may not be wide enough to engage the pan on boths sides. If this is the case, take those skewers and place them in the microwave for about 1 minute and 30 seconds.

Recheck the chicken, if it appears to be done (internal temp needs to be 165o F. ) Place back on the pan for approx 1 min on each side to re-assert it's charred flavor and appearance.

At this point you are done!

Place some generous spoonfuls of rice on a plate and grab a couple of kabobs and place them over the rice.

Carefully remove the skewered pieces, place them over the rice and go to town on that monster!


You Don't Need To Buy Bread Crumbs Ever Again

Okay, I like meatloaf, I like Shake And Bake whatever, be it pork chops or chicken.  That being said, I don't buy the packaged stuff all that often.  In fact, the last few times I set out to make something that required bread crumbs or Shake & Bake, I improvised my own recipes using stuff I had in the house.

Today, I'm going to show you two of those recipes.  One is for meatloaf and the other is for homemade Shake & Bake pork chops.

With the meatloaf what had happened was I had already started to make it, I had combined by hand the three meats and added sauteed onions. I then went to reach for the Panko bread crumbs that I usually have on hand and alas, there were none! I panicked! I wasn't going to abandon this recipe and I was already in my sweats so I wasn't inclined to go to the store.

What should I use? I looked in the pantry and I saw a box of Cheez-its.  I thought to myself, "this should work, it might give the texture I'm looking for and it might even add some dimension of flavor that will be interesting at least."

So I put about a cup of Cheez-its into a food processor along with a Cajun spice mix I had put together from an Emeril Lagasse recipe and chopped it up into a moderately fine consistency, kind of like bread crumbs, ha!.  I added it to the rest of the ingredients for the meat loaf, pressed the mixture into a casserole dish and covered it with a sauce made of ketchup, brown sugar, Frank's hot sauce and soy sauce. Baked that sucker for about an hour until the internal temperature hit 160, let it sit for 10 minutes and served that bad boy. 

Woooooo-eeeee! That stuff was amazing! I don't remember swooning as much as I had over a meatloaf dish. I would make that again, no questions asked.


The other make-shift, "oh, my goodness, I've no bread crumbs" moment was with making pork chops.  I had planned to make pan fried pork chops with cabbage and onions, one of my favorites, but I was outvoted by my kids in favor of Shake & Bake. Somewhat deflated, I went back to the kitchen and reached for the box of premixed ez-meal and did not find any. I was now faced with having to again go to the store. This time I was wearing my Captain Kirk Doctor Dentons and was by no means going to change just to get a 10 ounce box of salt and crumbs!

So I looked yet again into the pantry and found three slices of somewhat stale bread. Yes! Yes! This will do the trick! I thrust those bad boys into the food processor, added some garlic power, Kosher salt, pepper, Hungarian paprika and let 'er rip!

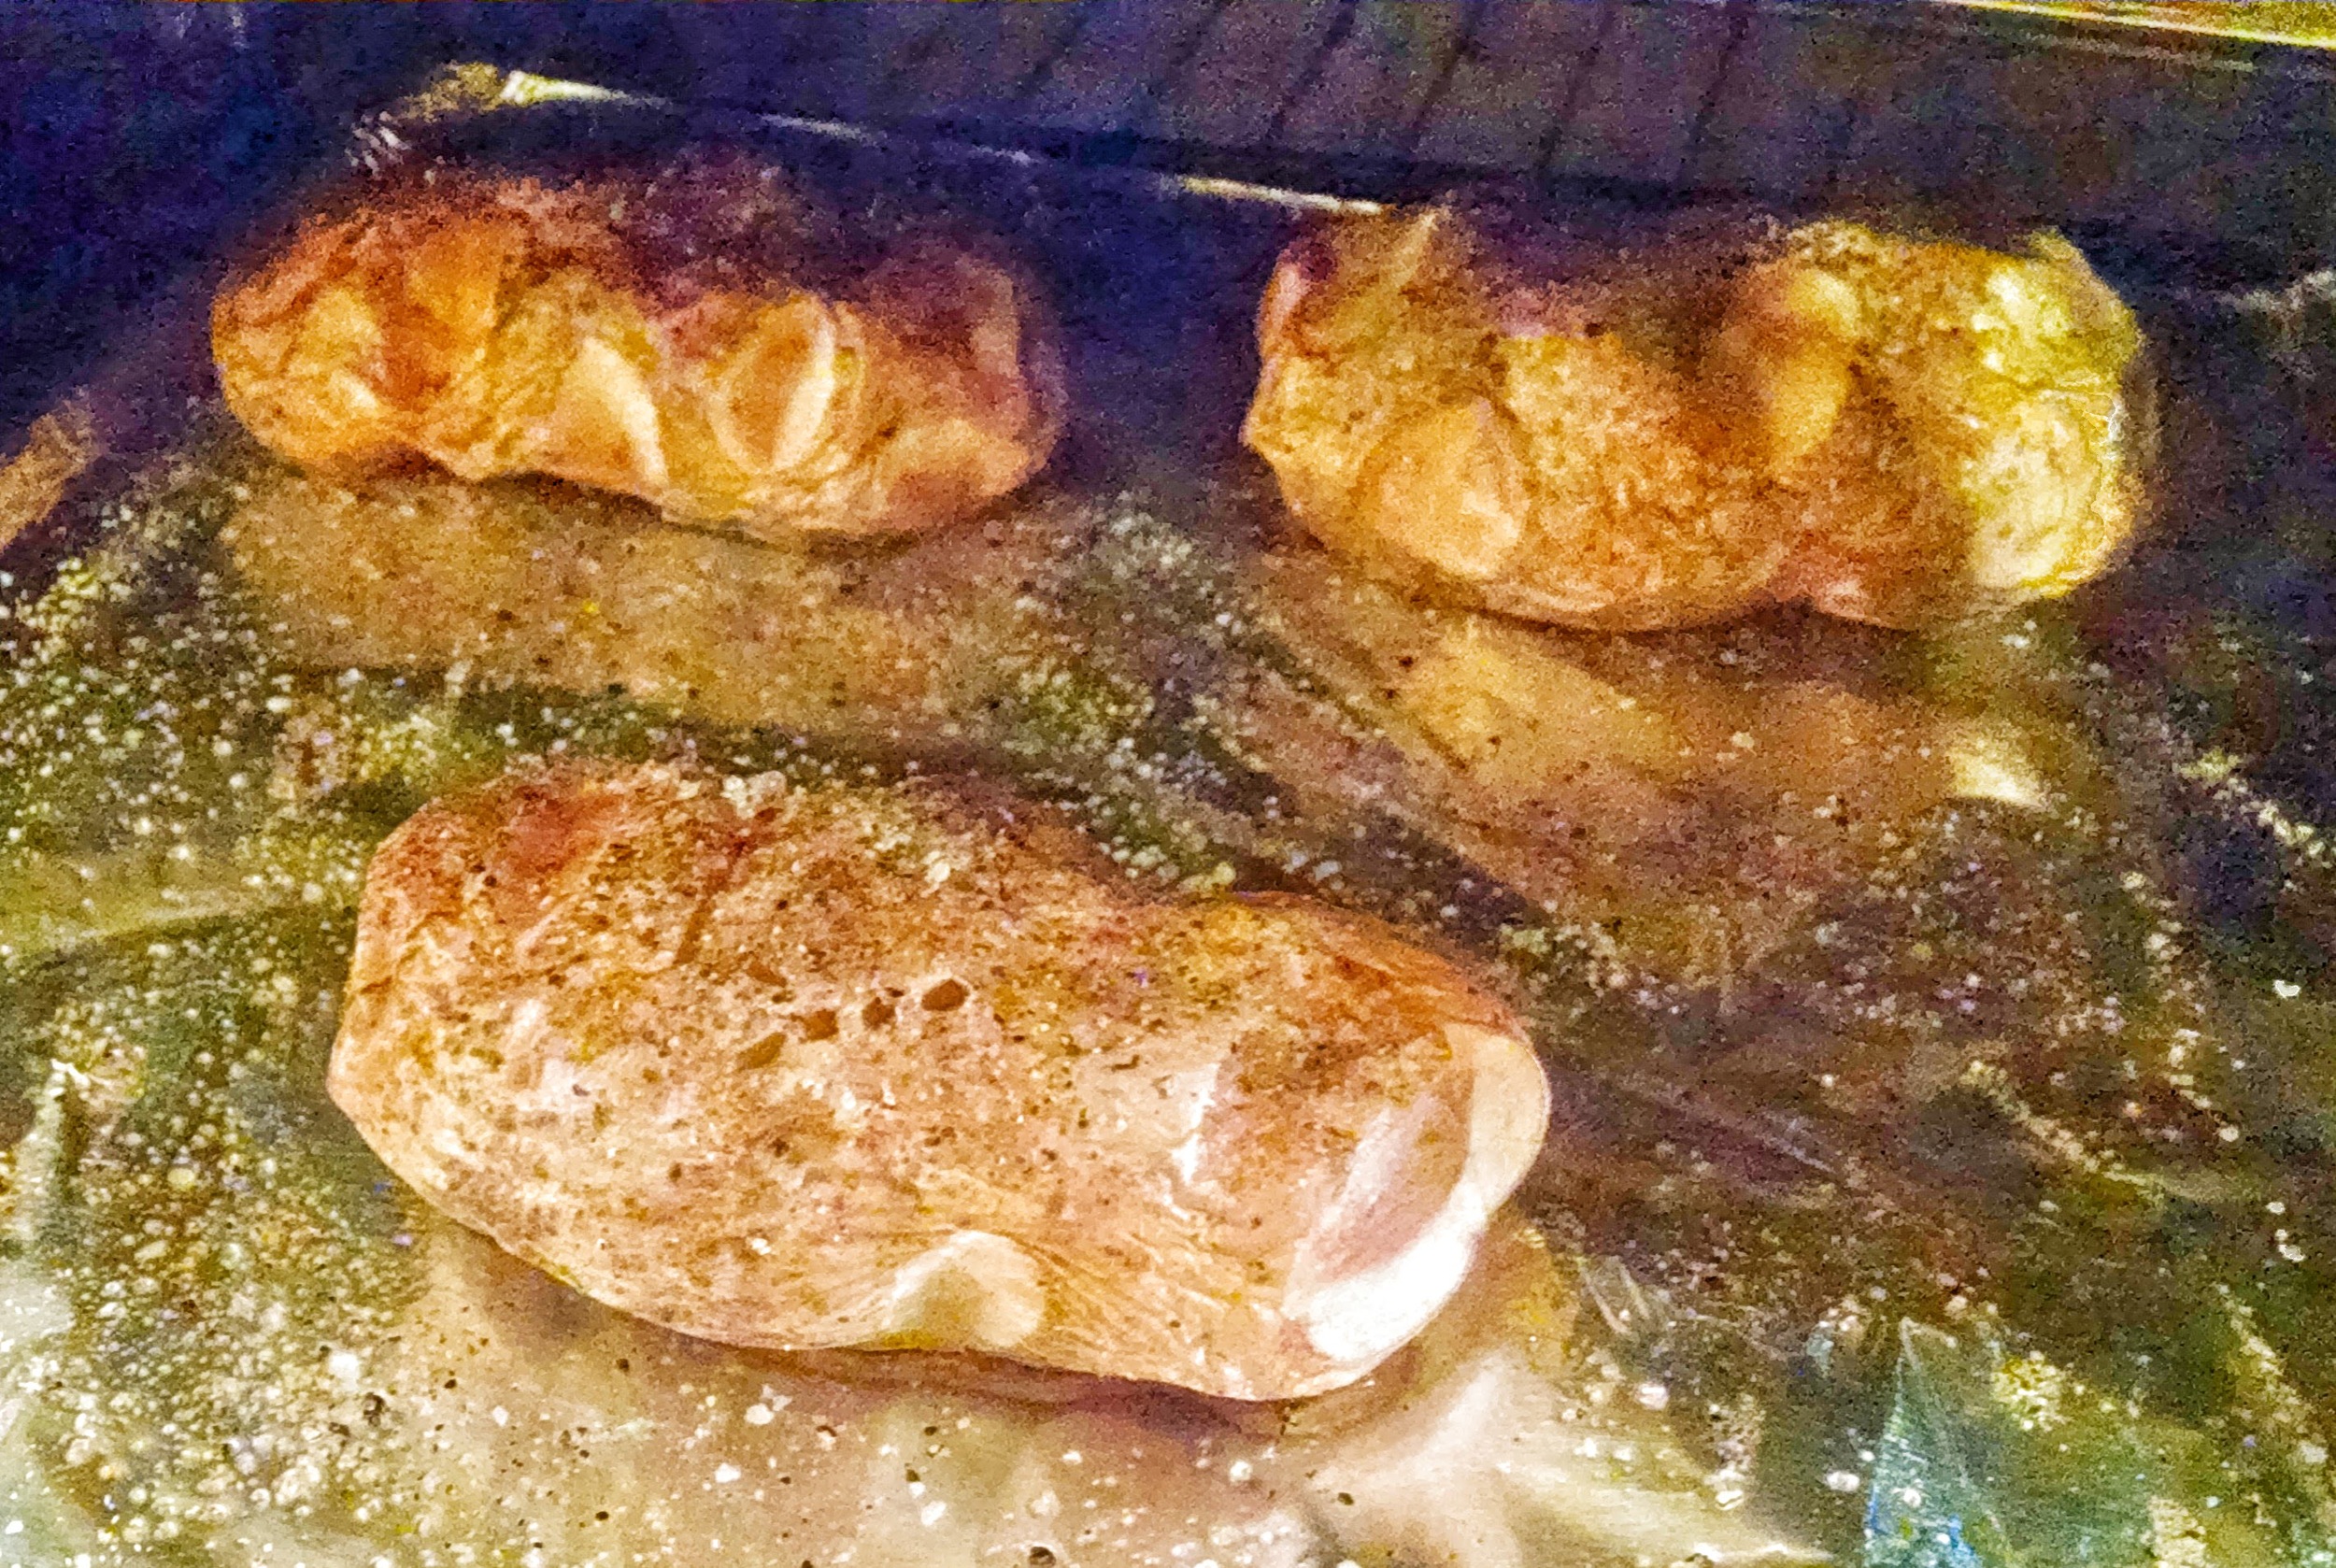
I then moistened the pork chops with a douse of tap water, patted them slightly with a paper towel and then tossed them around in the crumb mixture inside a gallon size plastic bag.  After letting them sit for about five minutes so the coating got all cozy on the chop, I put them in the oven at 400 degrees for about 25 minutes and served them up with some homemade mashed potatoes and string beans with lemon and butter. Ooooh boy! 

So those two revelations have opened up a myriad of possibilities when it comes to coating some protein for roasting in the oven or giving texture to a protein mash-up like meatloaf. I highly recommend you give these a try (see recipes below) and remember, this is yet another case of having complete control over the ingredients in what would otherwise be a premade, corporate-chemical food recipe.

Here's how to do it:

Homemade Cheez-it Meatloaf:

Ingredients:

Meatloaf Mix - chopped beef, port and lamb (approx 2 lbs)

1/2 onion, lightly sauteed in olive oil

2 cloves garlic, minced

1/2 tsp crushed red pepper

2 tbsp Creole Seasoning (see Emeril's recipe)

1 cup finely chopped classic Cheez-it snacks

2 eggs (lightly beaten)

2 tbsp Worchestershire Sauce

Ketchup topping:

1/2 cup ketchup

2 tbsp soy sauce

2 tsp Frank's Hot Sauce

1 tbsp light brown sugar

Recipe:

  1. Place Meat Loaf Mix into large mixing bowl
  2. Mush together (with hands) until all three types of meat are integrated - don't mush too much, over mixing can make a tough meatloaf.
  3. If you're like me: rinse freezing cold hands in warm water - I can't stand the cold.
  4. Place on top of the meat mixture: minced garlic, crushed red pepper, Cajun seasoning, Cheez-its, eggs and Worchestershire Sauce
  5. Mix, yet again, with hands until thoroughly mixed (now wash those hands thoroughly.)
  6. Place mixture into 9x9 greased glass pan (I use canola oil) and press down firmly until evenly distributed.
  7. Cover with Ketchup mixture (mix ingredients prior to topping meat loaf)
  8. Place in 375o oven for approx 1 hour or until internal temp in middle of dish is 160o  
  9. Let sit for 10 minutes and then serve, for crying out loud! Serve it!

Stale Bread Pork Chops:

Ingredients:

4 pork chops (bone-in or boneless)

3 slices stale bread (no mold, thank you)

2 tsp garlic power

1 1/2 tbsp Kosher salt

1/2 tsp pepper

1 tbsp Hungarian paprika (hot)

Recipe:

  1. Blend in a food processor the bread slices, garlic powder, salt, pepper and paprika until the mixture is a moderately fine chop (similar to Shake & Bake)
  2. Rinse chops in tap water and dab lightly with paper towel, keeping chop lightly moist.
  3. Empty bread crumb mixture into a gallon size plastic bag and place moistened chops one at a time in bag, shaking chop to cover it completely.
  4. Place each chop on baking sheet, keeping at least 1 inch distance between chops. Let sit for 5 minutes to let coating adhere to chops.
  5. Place in preheated oven at 400o and bake until internal temp is 145o, approx 25 to 35 minutes.
  6. Serve immediately - ENJOY!!!


Eureka!

Ok, so it has become a semi-ritual in my house to make some kind of special breakfast on the weekend.  It can vary from pancakes to waffles to omeletes to fritatas.  On the days that we have pancakes, I invariably have left over batter and a starving dad (yours truly) with no desire to have pancakes.  Well, after throwing out the leftover batter innumerable times, I decided to try something a little different.

First off, this must have been inspired by the episode of Diners, Drive-ins and Dives that I was watching on my kitchen computer that day. Guy Fieri was visiting restaurants that featured Mexican and South-West cuisine.  There was a lot of masa, peppers and pepperjack cheese going down that day and it all looked fantastic.

So wouldn't you know it, that's what I ended up using with what remained of the pancake batter?

Here's what I did:

1) I added approx a 1/4 cup of yellow corn masa to the 3/4 cups of left over pancake batter.

2) I chopped up about 2 tbsp of pickled Jalepeno peppers and 2 tbsp of sweet onions and added them into the batter.

3) I grated about 1/4 cup pepper jack cheese and added that

4) I seasoned it with salt, freshly ground pepper, Hungarian paprika, cumin and onion powder - to taste, y'all!

5) after all that, it got a bit thick so I added approx 3 tbsp of buttermilk.

When all was said and done, the mixture was like a slightly thicker than usual pancake.

Now here comes the major twist.  I did not just make a tasty savory pancake with this mutha.  Here's what I did next:

6) I heated a 10" cast iron pan over medium heat,  fried two strips of bacon cut into 1/4" strips.

7) Once the bacon was just starting to crisp up on the edges, I added a teaspoon of butter to the bacon and then then placed a 3" ramakin in the middle of the pan, displacing the bacon out to the edge. Making sure the ramakin was flat on the pan, I spooned the batter around the ramakin out to the edge of the pan over the evenly spaced bacon.

8) I then let it cook for approx 2 minutes or until the batter has solidified enough to allow me to take the ramakin out of the middle of the batter, leaving a round open area in the middle.  I then turned the heat up just a tad and let things sit for approx 30 seconds.

10) I then slapped another dab of butter in the middle of the pan where the ramakin was and cracked two eggs into the pancake crater - the Eagle has landed!

11) I then covered the pan, left the heat at medium high for about a minute so as to cook the top of the eggs and then took the pan off the heat, dabbled some more shredded Monterey Pepper Jack cheese and placed it in the oven at 400 for about 1-2 minutes or until the whites were fully formed.

12) I then plated the Masa Hub Cap of Love and did my best Jackson Pollack impression with some Sriacha.

Viola! I have a savory South Western pancake.  Oh, yeah, babe!


Creative Grilled Cheese

Sometimes you just don't have time to whip up a masterful dish for your kids.  Sometimes you just have to cobble something together that is easy and simple.  On the other hand, that does not mean that it has to be boring and forgetful.  It can be just as heart-warming and pleasing to the pallate as that 7-hour stew or the 5-cheese casserole.  And one of those meals that can do the trick is your good ole grilled cheese sandwhich!

The thing that takes this out of the ordinary is your leftovers.  Instead of just slapping a simple slice of cheese between two slices of bread, take a look in your pantry or fridge and see what might work in a sandwhich.

A quick pass through my fridge showed that I could add some cold cuts, olives (I'd crush or chop them up), onions or slices of pepperoni.  A trip to my pantry showed that I could make a tuna melt, or dip a finished sandwhich in some salsa.  See? Just a slight detour and the bland grilled cheese is now a bit of a culinary adventure. 

Now, here's how I make a grilled cheese, see if this might be helpful:

Grilled Cheese Sandwhich:

Ingredients:

2 slices of bread (your choice)

2-4 slices of American cheese (I use pre-sliced)

Butter (or margarine)

fun fillings: cold cuts, olives, onions (sliced), capers, etc...

Directions:

Important! - be sure to have all of your ingredients ready to go before heating up the pan, things can get fast and furious when bread hits the heat.


  1. Heat up a 8" frying pan with meadium hi heat
  2. Butter one slice of bread on one side and place in pan (there should be medium sizzling right away, if not turn heat up a bit)
  3. Place two of the slices of cheese on the bread in the pan so as to cover the bread completely.
  4. Place any other ingredients you want on top of the cheese.
  5. Place two more slices of cheese on top of the added ingredients
  6. Butter one side of the remaining slice of bread and place the non-buttered side on top of the sandwhich.
  7. Check the doneness of the slice of bread facing the pan by carefully lifting up the sandwhich with a spatula and peaking at it's underside.
  8. If the bread is golden brown, it's time to flip the sandwhich (this can be tricky)
  9. Flipping Process: place the spatula under the center sandwhich; lift approx. 2-3" above the pan; and quickly flip the sandwhich over with a quick turn of the wrist.
  10. If the sandwhich is misaligned, you can simply push the contents over the bottom slice by using the spatula and your protected fingers.
  11. Let the sandwhich fry for approx. 2-5 more minutes, checking doneness as you did previously.
  12. When the sandwhich is done, take it off the pan and let it cool for approx. 5 minutes.
  13. Cut sandwhich into slices and enjoy.

 And this is what it looks like in action:

Mom or Pop do some Popping.

My first post for SingleParentChef.com will be a simple, yet very popular treat: homemade popcorn. 

There's a good chance that if you're new to getting food on the table for your kids, you've learned the names of the employees at all of the fast food joints in your area.  This habit of bringing home junk food will be hard to completely break at first since there are some techniques that you'll have to learn. In line with that, I thought it a good idea to start with something that's somewhat easy to make and a sure-fire hit with the kids.

In order to make this recipe you'll need the following:

Hardware:

  • a large 2-4 quart pot (with lid) - NOT non-stick.
  • a stove - either gas or electric.
  • a microwave oven - for melting the butter.
  • a measuring cup - 8oz size will do just fine.
  • a microwave safe coffee mug
  • a large bowl - the size you'd use to put a bag of chips in.
  • measuring spoon - tablespoon size is all you'll need.
  • Pot Holder - make sure this is well padded, if you're not used to the heat of a stove, the steam, etc. that comes up from the pot can be somewhat daunting; so the thicker the padding of the pot holder, the less disruptive these elements will be when you're popping away.

Software:

  • 1/3 cup popcorn - you don't need to get those brand name jars - I get the house brand in a 4 lb. plastic bag; it's at least 1/2 the price and works well.
  • 1-2 tbsp butter - with salt; don't use margarine - it reacts in a rather strange way with the popcorn that melts the kernal's meat instead of coating them and leaving them intact and crunchy!
  • 2-3 tbsp vegetable oil - peanut or safflower (they don't smoke/burn easily).
  • Salt (to taste) - I like Kosher salt but the standard kind with the girl and umbrella on the box will do okay.

The Process:

First of all, BE CAREFUL!  The pot gets very hot when you do this so I wouldn't recommend doing this as a family project the first time. Although the kids love to put the starter kernals in and stay nearby when the popping ensues, you want to be comfortable with the process first.  Just be mindful that the oil can splatter and some kernals can pop even when you think all the percussion has ceased.

Okay, now with the PSM out of the way, let's get the materials in place and start popping.

  • Place the bowl on a counter top nearby. 
  • Place the butter in the microwave safe bowl or coffee mug and cover it with a wet paper towel (it can tend to splatter) and put it in the microwave, setting the timer to 30 seconds on high.  DON'T START THE MICROWAVE JUST YET.
  • Pour the popcorn into the measuring cup.
  • Place the pot on the stove and turn the burner to high.
  • Immediately pour the oil into the pot.
  • Carefully place seven (7) kernals into the pot as it's heating and cover the pot.
  • At this point do not go to the other room to check the baseball score or take a pee (have one of the kids do that for you ;-)
  • Listen carefully and count the kernals popping.  When the seventh kernal has popped, open the lid and pour the rest of the popcorn into the pot.  NOTE: Be sure you hold the lid with the pot holder.
  • Immediately put the lid back on with your pot holder on top and while holding the handle of the pot, shake it to and fro over the burner in a relatively quick mannner.
  • Almost right away you should start to hear kernals popping.  If all goes as expected, the popping should get fast a furious within a minute.  You'll know that you're near the end as the popping slows.  As a general rule, once the pops get 2-3 seconds apart, you should turn the fire all the way off and take the lidded pot over to the bowl.
  • Empty the contents of the pot into the bowl (sometimes a renegade kernal will pot at this point). Put the pot back onto the stove along with the cover. DO NOT PUT THE POT HOLDER ON THE STOVE OR ANY WHERE NEAR IT - THEY BURN!
  • Hit the start button on the microwave.
  • As the butter is getting melted in the microwave, pour salt to taste onto the popcorn.  It is very important to put the salt on the popcorn right away before the butter is drizzled on so that the salt is distributed evenly and sticks to the popcorn.  Otherwise, the salt will tend to stick to the kernals coated in butter and not at all to the rest.
  • Once the butter is completely melted, drizzle the butter evenly over the top of the popcorn and right away pick up the bowl and shake it in such a way as to disrupt all of the kernals.  Do this for about 15-20 seconds.
  • Now, and this is very important, go into the TV room and watch TV with your kids while enjoying the popcorn.
  • Depending on how many people will be eating this delectible treat, you may have to repeat this process.  Just be sure to wipe the cooled pot with a paper towel so as to prevent the straggling kernals from burning.
  • That's about it, I recommend watching the accompanying video so as to enhance your understanding and my YouTube.com views. Otherwise, that's it!

Enjoy!