
Grilled Cheese Mania!
Grilled cheese sandwiches are a go-to dish for a quick dinner. In their most basic form they're just two slices of bread with American cheese. Even something as simple as that is delicious. But what I'm going to show you today is transcendent!
This particular version features two cheeses - sharp cheddar & Pecarino Romano and two meats - hard salami and leftover London Broil. Granted, the palate for this version skews a bit toward the teenage/adult side, just remember that you can mix things up to cater to younger tastes.
What's most useful in this recipe are the techniques I use - instead of using whole slices of meat, I cut them thin so that you don't accidentally pull out a huge slab of meat on your first bite. In addition, I grate the cheese so that it melts quicker.That way, you don't have to leave the sandwich on the grill just to wait for the cheese to melt.
Also, the order of ingredients in the sandwich is important. You want to put condiments on both sides to get full flavor impact and ingredients prone to slippage do best, in my opinion, when placed next to the cheese which acts as a kind of culinary glue.
Okay, enough of my grilled cheese science, let's get to cooking!
Grilled Cheese Mania Sandwich
Hardware:
- 10" cast iron pan or any non-stick pan of the same size. The heavier, the better so as to retain/regulate the heat from the stove.
- Long, thin spatula - this is very important for flipping. See my Hardware section for particulars.
- 6-10" chef's knife
- Cheese grater
- Butter knife
- Cutting board and paper plates.
Software:
- Two slices round Italian bread (or rye)
- Imitation butter spread or soft, salted butter
- Red onion - thinly sliced
- Horseradish spread (you can substitute with mustard and/or mayo)
- Salt
- Pepper
- 3/4 cup sharp cheddar cheese (grated - approx. 3 oz chunk)
- 1/4 cup Pecorino Romano cheese (grated - approx 1 oz chunk)
- Sharp hard salami - sliced into thin strips
- London Broil - sliced into thin strips.
How It's Done:
Prepare all of your ingredients before actually cooking the sandwich. In French cooking they call this mise en place.

Preheat your pan over medium-low heat. You don't what a super hot pan for this. More on this later.
Select two matching slices of bread from the middle of the round loaf, place them face to face on your cutting board and butter the top side of the top slice.

Place the buttered side of the bread onto the pan. When the slice hits the pan, it should sound like this:
Now things should go somewhat quickly since your bread is being toasted.
Squeeze some horseradish spread onto the slice of bread, smooth it out with the back of a spoon. Then lay the slices of onion on top of that.
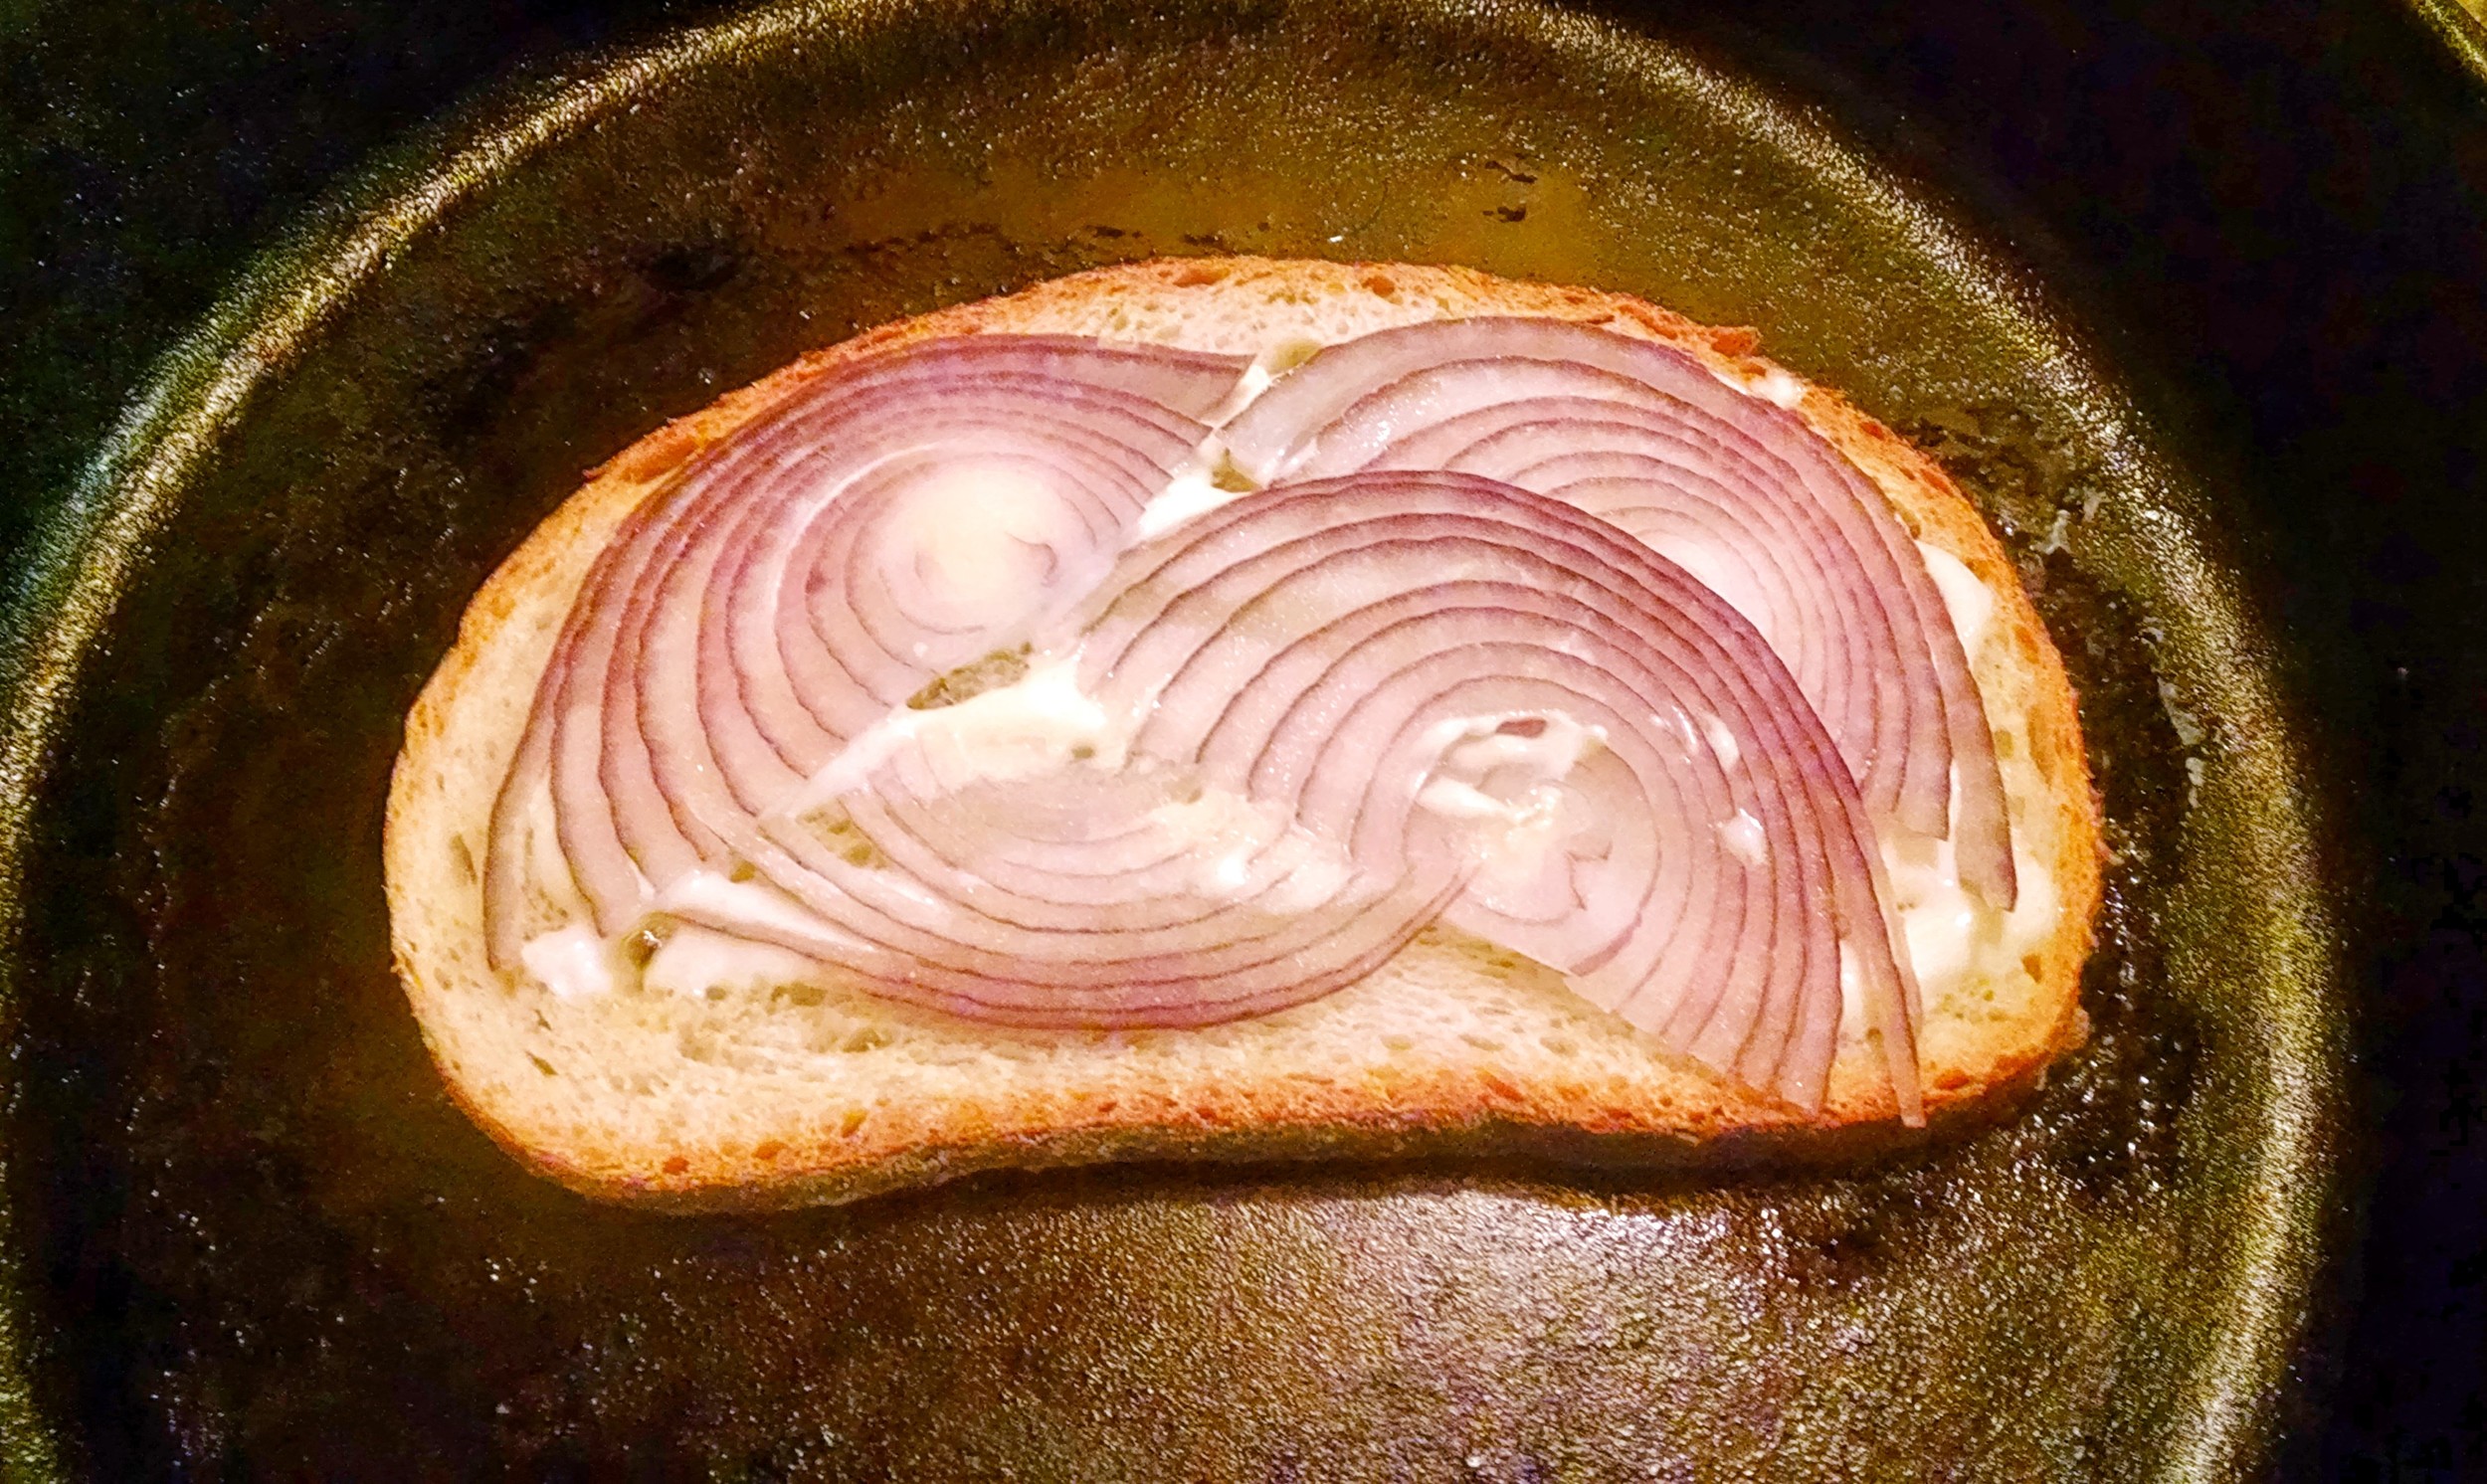
Add salt and pepper (just a bit, flavors will add up as you layer the ingredients)
Lay the grated cheddar and 1/2 of the Pecarino Romano cheese onto the onions.
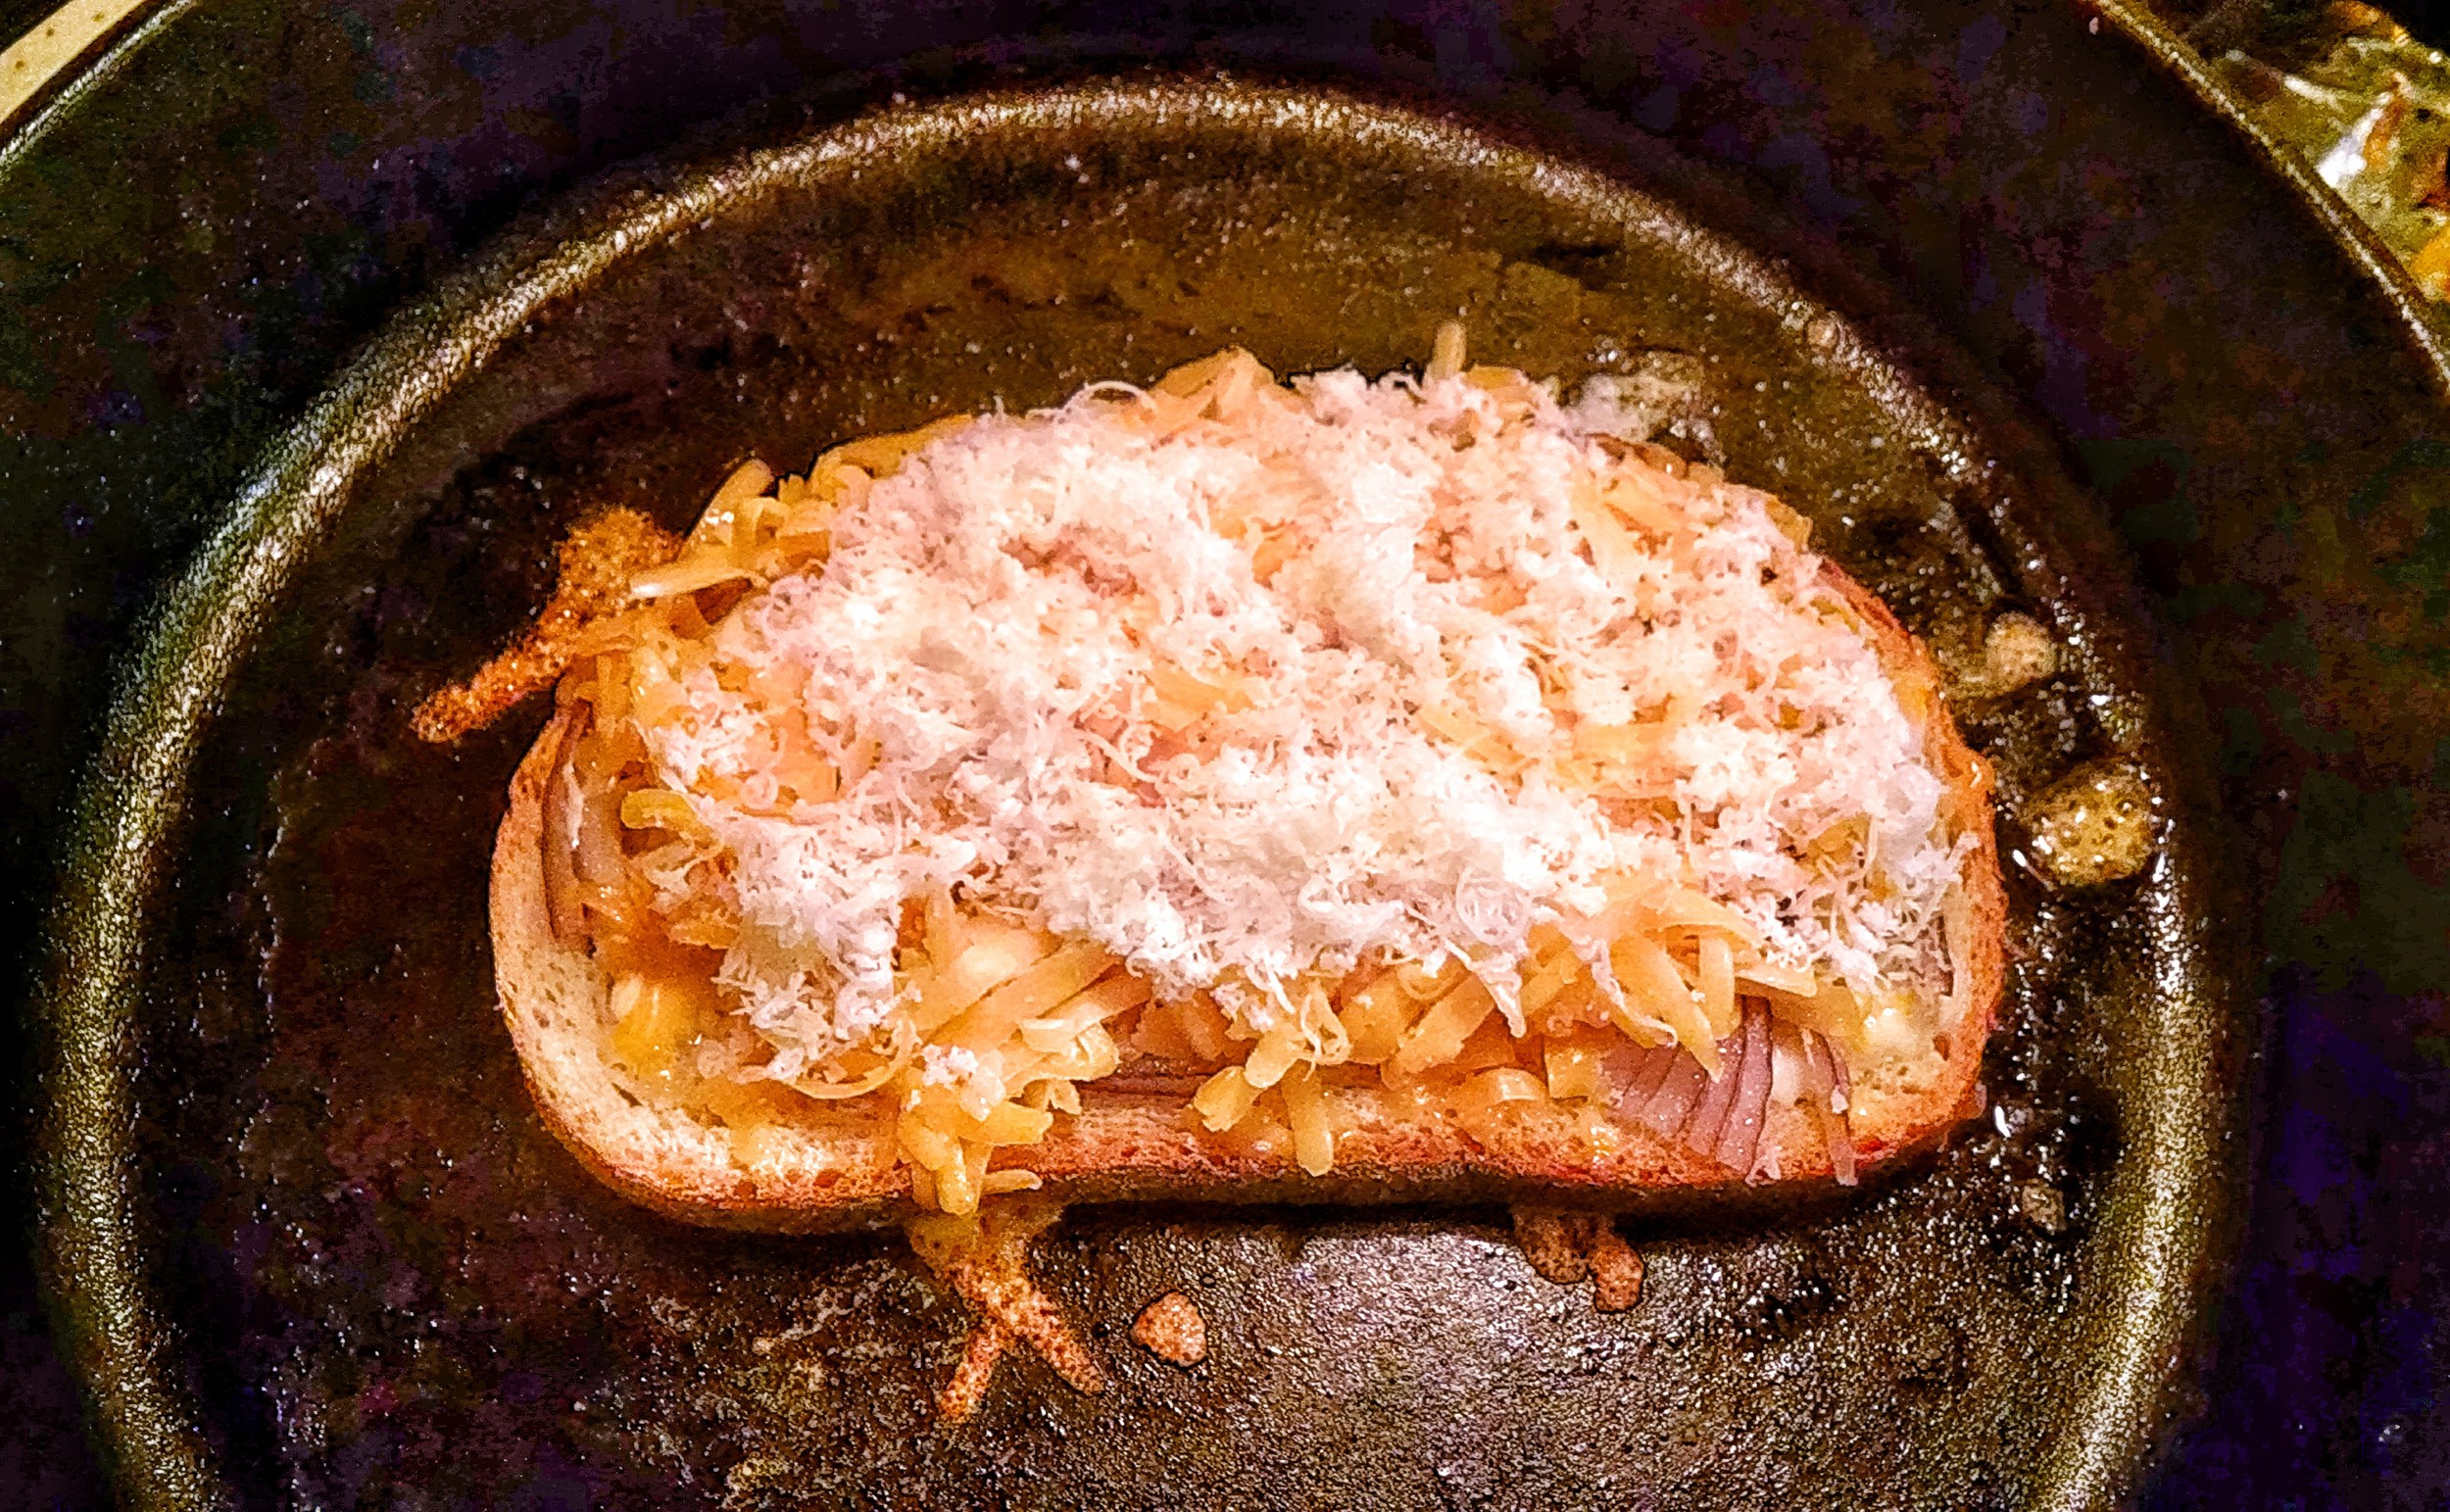
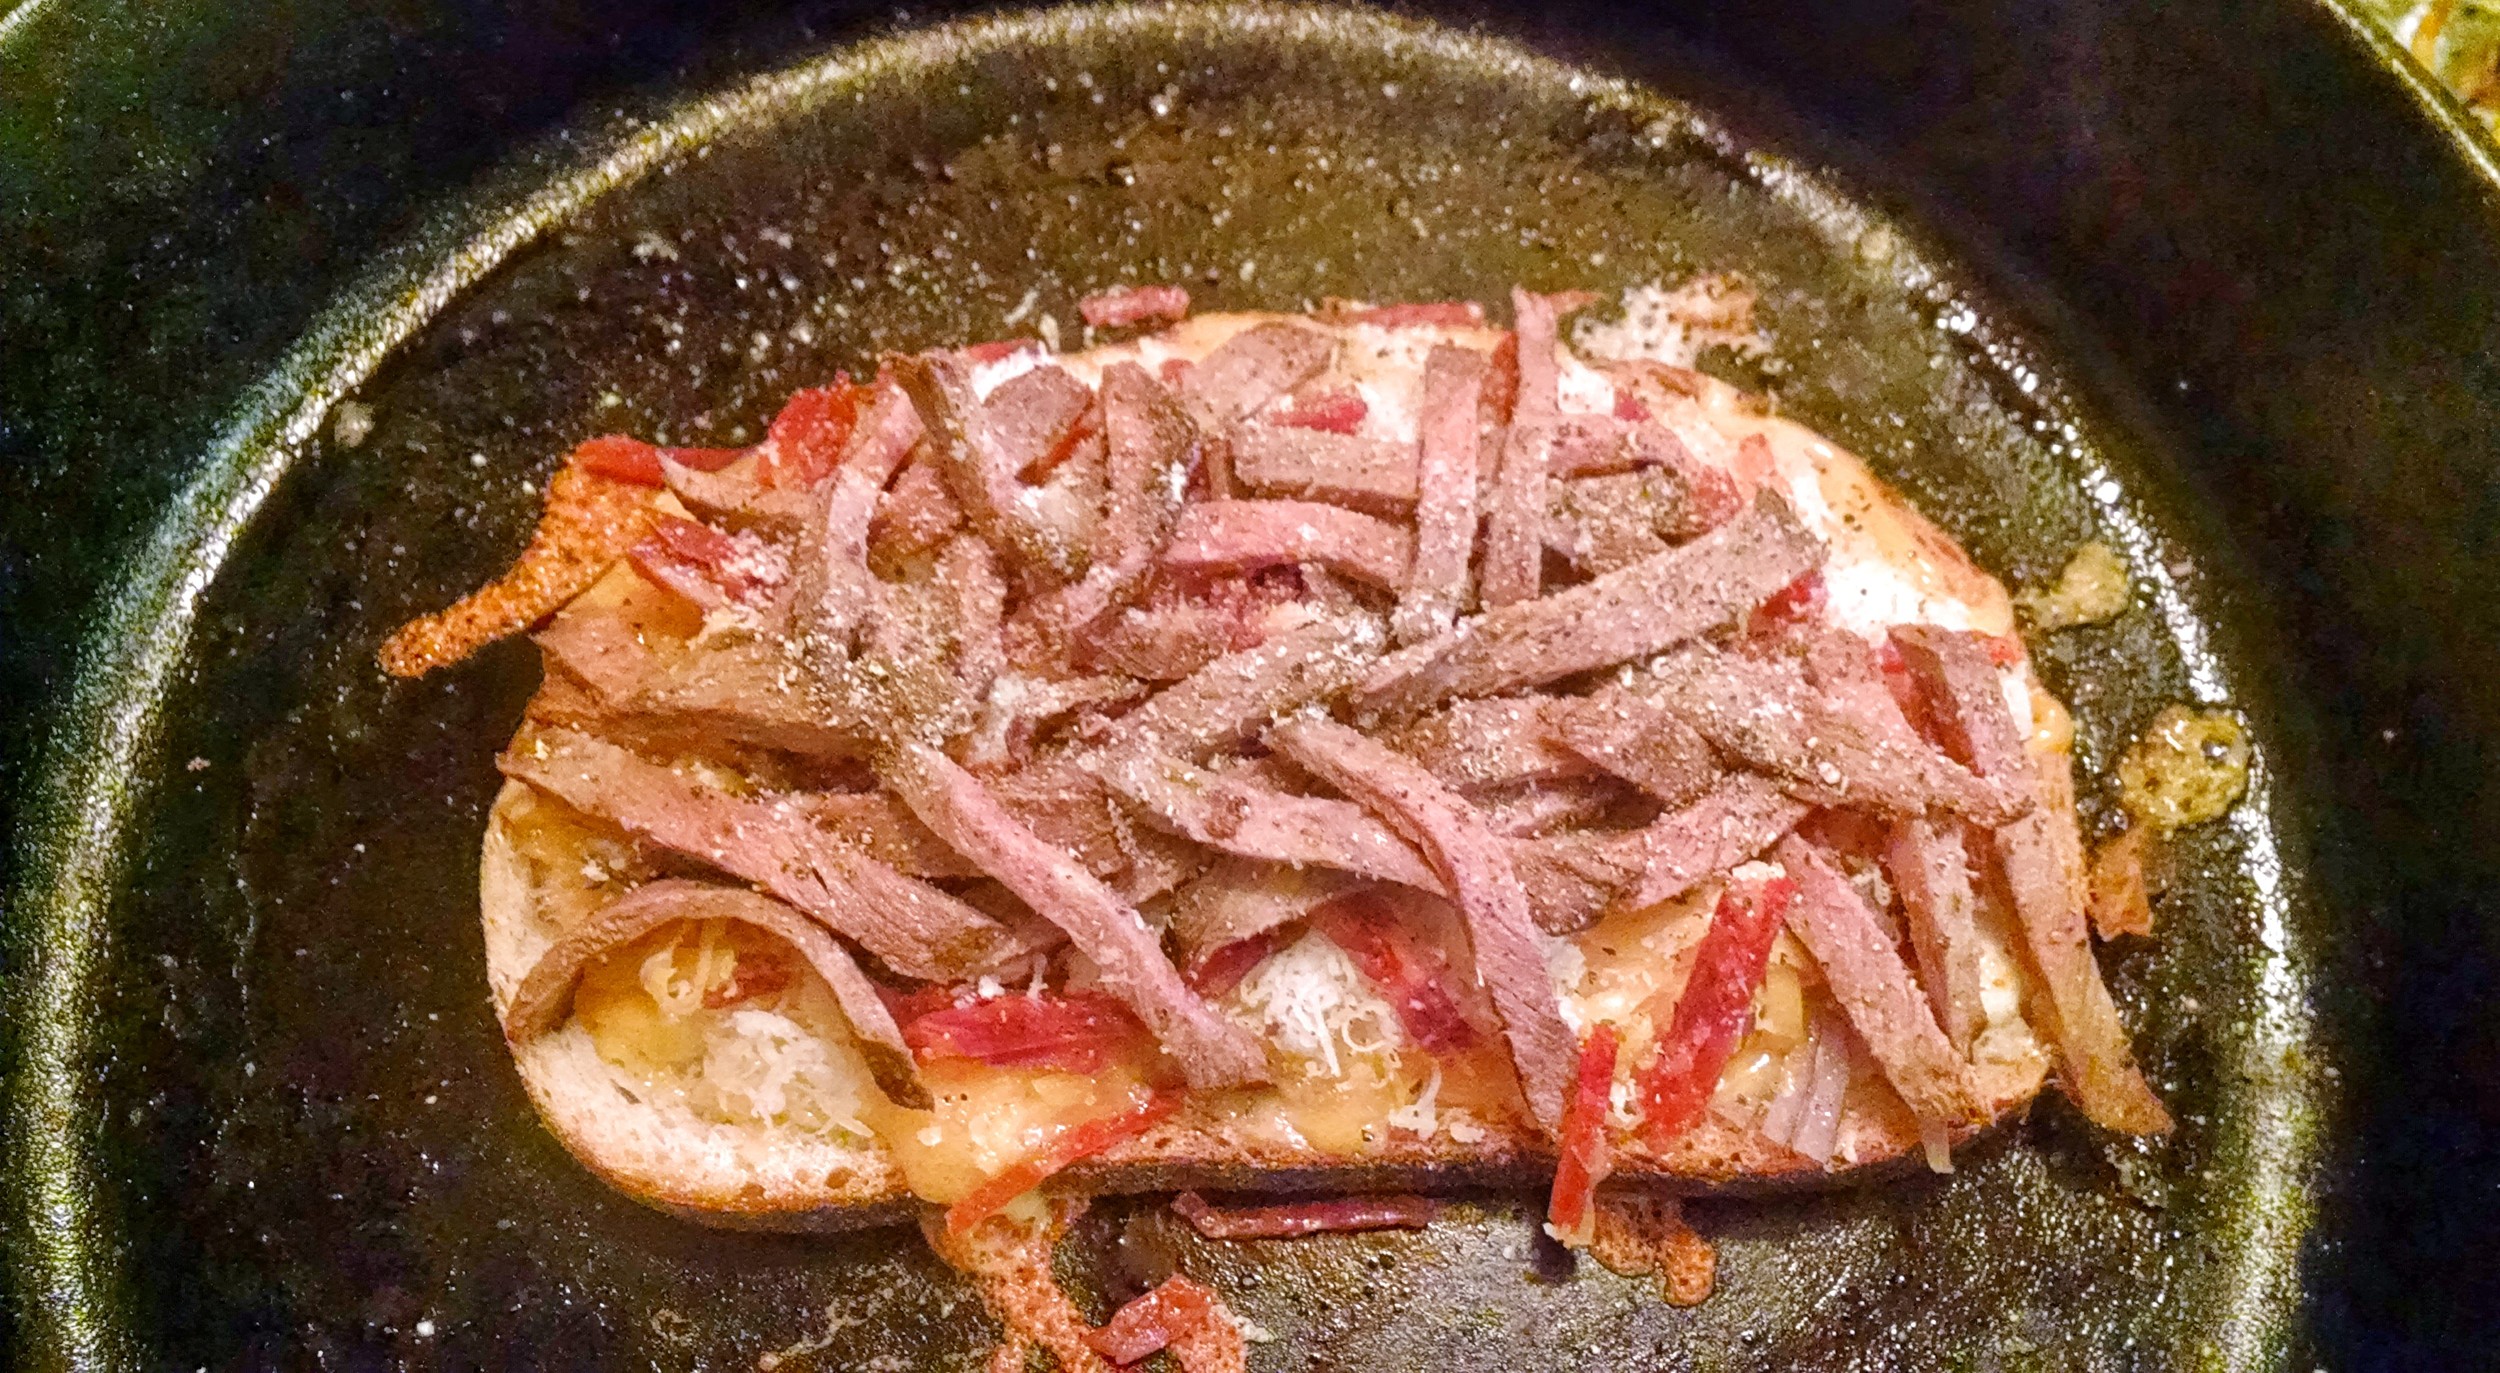
Once you've got the two cheeses in place and they start to melt a bit (look to the edges for meltage), place the two sliced meats on top, salt a pepper again.
Oh, mama! I wanna eat, now!
Sprinkle the remaining Pecorino Romano cheese over the meats and squirt some more horseradish sauce over that.

Now, flip over the bottom slice of bread and butter the newly exposed side. Place that slice, butter side up, on top of the sandwich and gently press down on it. There will be some seepage and sizzle - don't worry, it's all good.

Press lightly, my friend...
Now we're at the moment of truth, it's time to flip the sandwich over. Before you do, you need to lift the sandwich up high enough for you to look under it to see if it's done. If it is (it should be a nice golden brown), then place your long spatula down the middle of the sandwich lengthwise. (Here's a picture of an already flipped sandwich with the spatula holding the sandwich in flipping position.)

I should have taken this pic prior to flipping, my bad.
And with the sandwich elevated approx 3-4 inches above the pan, simply (ha! simply he says!) rotate your wrist quickly to flip the sandwich. Go ahead, you can do it....go ahead! NOW!!!
Now we have a flipped sandwich and you should be hearing that sizzle yet again. If bits have flown out, just push them gently back into the sandwich or just go ahead and give your self a pre-meal nibble (be careful, it's hot!).
Now the rest is simple, just wait about 3-5 min and then give the underside a check like you did before. If it's ready, take the sandwich out of the pan and place it on the cutting board to sit for another 5 minutes. I said wait! ;)
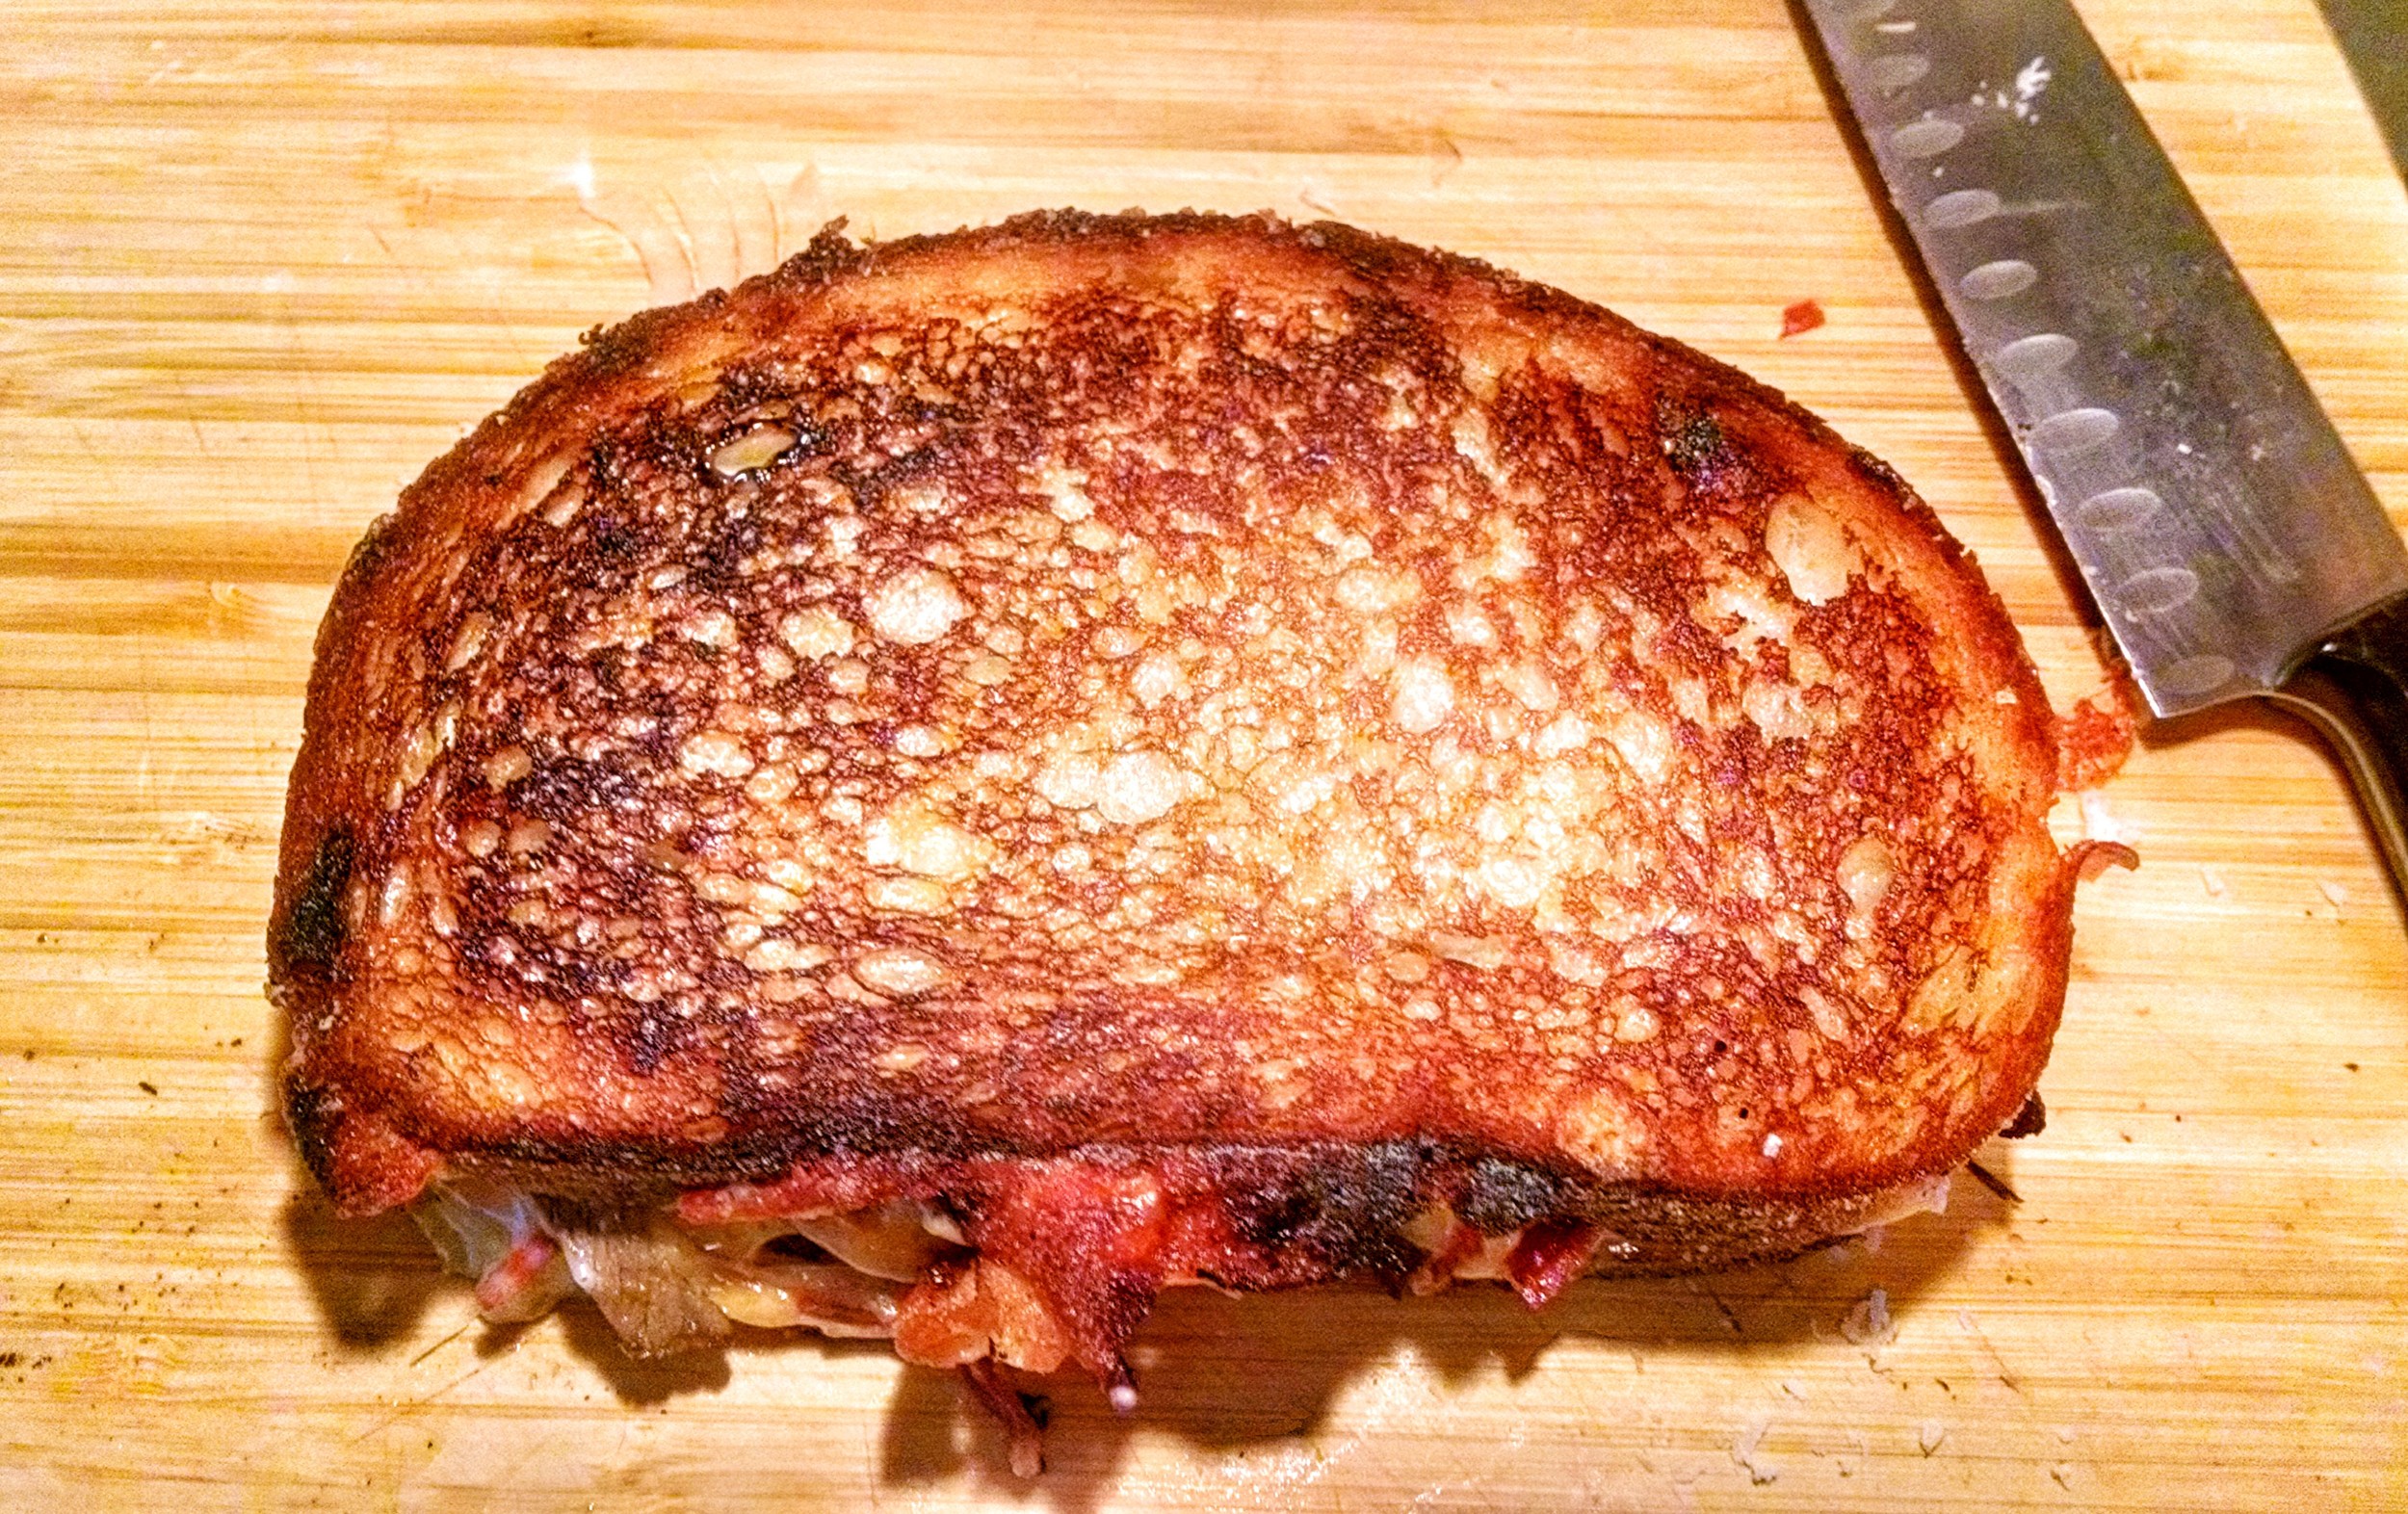
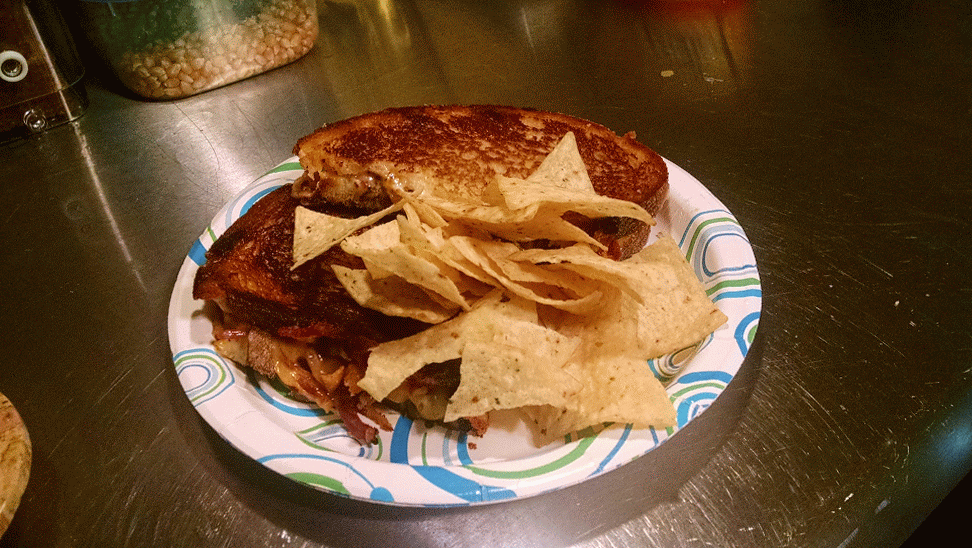
Once it's been sitting for 5 minutes, go ahead and give it a cut. There will be crunching and there will be joy throughout your house as this beautifully simple gem is made ready for consumption! Huzzah!!!

Melty goodness!
Just park this bad boy on a paper plate with some chips and you're ready to go - go and have a blissful moment of culinary joy, that is!
And remember, you can use more kid-friendly ingredients to suit your family's tastes and lastly, please experiment with various ingredients and condiments. This stuff is fun!
Enjoy!
Nurture!
Cheers - SPC!
Side Note:
Most of the time there'll be crunchy bits of melted cheese on your frying pan. DON'T THROW THEM OUT! These bad boys taste fantastic!. Just lift them off your pan with a spatula and give them a few seconds to cool down and then crunch away!